September 14th, 2015

How to whip egg whites & obtain high volume with stability

Coco&Me - How to whip egg whites ~ How to obtain high volume foams with foam stability ~ www.cocoandme.com ~ Coco And Me

.

Getting the most out of your ingredients is, I think, one of the most delightful things to do as a baker or a cook. It brings out the best results (in our case, a fine & moist sponge that has high volume!) & because you know how to best approach the ingredients, you can progress with the baking in a relaxed, untroubled manner.
– I also think we can get a lot more out of the ingredients when we treat it with respect & use it to its full potential. By proceeding with respect & gratitude to our foodstuff for being available to us, the sense of pleasure from cooking with it & then eating it is tenfold.
.
In terms of baking, whipping the egg whites is an essential technique.
.
There are actually 3 distinct methods to whip ~ French, Swiss, & Italian way. Each are suited for different desserts. For example, the French meringue method is often used for sponge baking. The Swiss & the Italian method on the other hand are often used in cold mousses & cremes because the heat-process kills off bacteria, & makes it safer to incorporate.
.
The French meringue technique is by far the most widely used in home baking, so for this post I would like to focus on that & tell you everything I know to make foam that is fine & stable.
.
Fine foam = results in fine structured sponge (as opposed to course textured) that has a tender mouthfeel.
Stable foam = will not deflate so readily. Particularly vital for retaining the volume of the foam when folding in to the batter. It will also give you a bigger & fluffier sponge.
.
So, below, I have written the ‘how-to’ in steps (in bold letters) with the reasoning behind each (in regular letters). It gets a bit too science-y, but hopefully I have managed to get it across well enough! Happy reading~! xx
.
x . . x . . x . . x . . x . . x . . x . . x . . x . . x . . x . . x . . x . . x . . x
.
Coco&Me’s How Best To Whip Egg Whites
.
1. 
Start with eggs straight from the fridge.
.
I know some say use room temperature, & some say no, use refrigerated. ~ So here is the logic to both:
.
The room temperature egg white is indeed easier to whip. It will trap the air easier because the surface tension is weaker. (= surface tension is the elastic tendency of liquids which makes them acquire the least surface area possible). But the downside is that the foam is less stable/ easier to deflate because it is not as viscous/ thick.
.
Whereas, for the cold whites, although it takes longer to whip (because it is thicker), the foam will come out stable. You will be able to create a much finer foam too, as, when you whip the stable foam, you are successfully splitting it to smaller multiples without it deflating.
.
= Using cold refrigerated egg whites wins the competition.
.
Some patissiers even go as far as putting the egg whites in the freezer until it is 1~4 degrees centigrade so that they have the added effect of having a head-start.
.
2. 
Separate the egg whites in to a dry clean bowl that is not plastic. - Make sure you don’t have any broken yolk residue. 
.
The reason for both has to do with lipids (another word for ‘fats’.) The fats contained in the yolk & any trace amount of oil on the surface of your mixing bowl has the negative effect on the foaming properties. 
.
To explain why, I first need to tell you about what happens when you whisk:
.
When you whisk the egg whites ~ which is made of about 90% water &10% protein ~ the tangly globular balls of protein uncurls. This is a process called denaturation, & as it uncurls, it exposes it’s long strands of amino acids. These amino acids has two distinct ends; the water-loving ‘hydrophilic’ & the water-repelling ‘hydrophobic’.
.
As the 10% protein uncurls in the 90% water, it aligns itself inbetween the water & the air, because of the hydrophilic/ hydrophobic nature. – Meaning, it immerses the hydrophilic end to the water, & sticks the hydrophobic end to the air.
.
Upon whisking air in to the egg whites, all the while, the uncurled strands get busy to attach to it & consequently traps the whisked in air within its new tangle. This tangle is now a network which crosslinks & holds its shape, stabilising the foam.
.
It’s a little difficult to grasp in words, so have a look at my diagram below:
Coco&Me - How to whip egg whites ~ How to obtain high volume foams with foam stability ~ www.cocoandme.com ~ Coco And Me ~ the perfect meringue
.
Getting back to why lipids (such as fats from yolk & the grease from the bowl) inhibits the foaming properties is because it interferes with the protein that want to make a stable network. Namely, the air bubble & the lipids are in competition for the water-repelling hydrophobic protein.  
.
As for why plastic bowls are not a good idea to use is because plastic is a porous material, & sometimes it can have residues of fats from the last use, even if you think you have washed it well.
.
3.
Firstly, on the lowest speed, loosen it up. 
The egg whites has two parts ~ the thick viscous portion that used to surround the yolk & then the other part which is watery. It is best to first whisk those two parts together to blend it. This is because the watery part gets foamy quicker as it has less surface tension (same explanation as in step 1). When the two parts are blended, they foam at equal speed.
.
Coco&Me - How to whip egg whites ~ How to obtain high volume foams with foam stability ~ www.cocoandme.com ~ Coco And Me ~ the perfect meringue
(First on lowest speed!)
.
4.
When most of the liquid has turned fluffy white, & the foam starts to cling to your whisk, put in the first 1/3 of the sugar. Then turn the speed to high. 
.
Coco&Me - How to whip egg whites ~ How to obtain high volume foams with foam stability ~ www.cocoandme.com ~ Coco And Me ~ the perfect meringue
(Ready for the first sugar to be poured in!)
.
The timing at which you add sugar is very important. If too early, the foam will not stabilise & will be syrupy. And if too late, the water within will leak. To figure the timing for sugar, it’s best to understand the role of sugar in egg whites.
.
Sugar is hygroscopic (= it attracts & holds water molecules from the surrounding environment).
.
When you add sugar, the water content of the egg whites is withheld. The water becomes viscous/ thick & elastic. This thickened water has a stabling effect on the protein structure & holds the air bubbles in place.
.
This viscous water greatly helps when the cake is in the oven, as, the water is so thick, it is difficult for it to readily escape as vapour. As a result, it holds the air bubbles in place while the cake structure is stiffening its shape around it.
.
Which is all great news, but on the other hand, it is important to know that sugar has a negative effect on the foaming properties & results in reduced volume. If the water is too viscous, it is difficult to form the bubbles inside.
.
This is why sugar has to be introduced in stages, with the right timing. The egg white has to be foamed enough to accept the inclusion.
.
5.
The timing for the next sugar is when the volume has massed, & the foam is starting to get evenly fine. Put in half of the rest of sugar. The speed of the hand mixer should remain on high.
At this point, think about how your whisk is mixing it. The ideal way is for the whisk to incorporate as much air, right? So, if the whole whisk-head is submerged completely in the whites, it’s not catching in any air.
– Also, rotate your bowl so that you are whisking from every angle, & from every nook so that it foams uniformly.
.
Coco&Me - How to whip egg whites ~ How to obtain high volume foams with foam stability ~ www.cocoandme.com ~ Coco And Me ~ the perfect meringue
(The foam’s evenly fine! Next sugar please~! Whizzing on high.)
.
6.
When you feel the foam is getting heavier & you can see stroke patterns, put in the rest of the sugar. – Nearer the end, when you think it has reached maximum volume, lower the hand mixer speed to low.

.

Coco&Me - How to whip egg whites ~ How to obtain high volume foams with foam stability ~ www.cocoandme.com ~ Coco And Me ~ the perfect meringue

(Soon as you can make strokes in the whites, put the last lot of sugar in.)

.
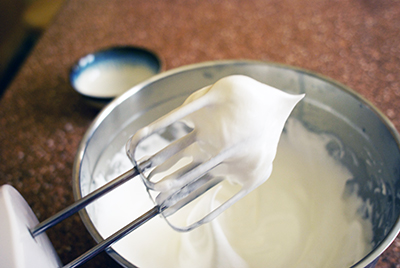
Coco&Me - How to whip egg whites ~ How to obtain high volume foams with foam stability ~ www.cocoandme.com ~ Coco And Me ~ the perfect meringue
(Done? Wait… there’s one last step…)
.
7. 
As a last step, whiz your mixer around the outskirt edges & tighten the foam to make sure that the foam is of equal fine-ness all over. 
In culinary terms this is called ‘serrer’. Foam on the outskirts tend to be less whisked. Because of that it tends to have a larger air bubble. In baking, it is best to have uniformly sized foam, as the larger air bubble will absorb the nearest smaller ones & become bigger (=’Coalescence’), giving you an unevenly textured sponge. 
.
Coco&Me - How to whip egg whites ~ How to obtain high volume foams with foam stability ~ www.cocoandme.com ~ Coco And Me ~ the perfect meringue
(Don’t forget the edges~! Above picture is an example of how the edges have bigger bubbles, so make sure you whisk these big bubbles too!)
.
x . . x . . x . . x . . x . . x . . x . . x . . x . . x . . x . . x . . x . . x . . x
.
Note A:
The ratio of whites to sugar:
When the amount of sugar is more than half of the whites, it is recommended to add sugar in 5 stages, not 3. This is because you’ll want to give each sugar inclusion a chance to melt before the next. – On the other hand, if the amount of sugar is less than 1/3 of the whites, the foam will be unstable & would not keep shape so well. The bubble will collapse too soon as it bakes & the sponge will come out too dense. I often hear of ladies with health conscience cutting back on sugar in the recipe, but I don’t recommend messing with it. But then again, so long as they don’t blame the recipe itself, it’s their cup-of-tea in the end I suppose…, right?
.
Note B:
About adding a pinch of Cream of Tartar & lemon juice or vinegar:
It’s all about the science-y pH balance…
.
The pH is measured between 0 to 14. 0 being ultimate acidic, 14 being ultimate alkaline. Lucky number pH 7 sits in the middle at neutral.
.
Our egg whites in question is sitting around pH 8 to 10 (Actually, more precisely speaking, fresh egg is pH 8, & older egg is at pH 10 as the acidity escapes from the pores of the egg shell during storage). Meaning, it is slightly on the alkaline side of the scale.
.
Lemon juice & vinegar is very acidic. They sit on a pH 2. Cream of tartar is at pH 4. Each number on the scale is 10 times more either way each time, so you can just imagine how super acidic these are.
.
In terms of whipping egg whites for baking, the protein strands (as explained in Step 1) react better when it is near pH 4 to 6. From this you can understand that when you add lemon juice/ vinegar/ cream of tartar,  you are readjusting the pH so that your egg proteins have a better chance. Note of warning though – too much added will have an inhibiting effect on foaming.
.
When I bake, I personally don’t bother with lemon juice/ vinegar/ cream of tartar. I like preciseness, so when a recipe calls for a ‘pinch’, it is too vague for me. But, if you are to use any of these ingredients, I would suggest that cream of tartar is probably the best option of the lot, as it is the least acidic at pH 4.
.
Note C:
Should sugar be added in the middle or the side of the bowl?
Quite some years ago, I came across somebody’s food blog, boasting about how adding from the side of the bowl was her idea, & how the method caught on. “…as dumping sugar in the centre would deflate the foamy whites.” Firstly I should point out, that that is wrong. Please pour in the sugar in a slow steady stream in the centre. If whipped correctly at each stage, the weight of a bit of sugar will not deflate any foam. The major problem when adding from the side of bowl is, it is a lot more difficult to get your whisk to, & because of that, you might have granular bits that hasn’t been incorporated sitting on the side, which would make your whites syrupy.
.
x . . x . . x . . x . . x . . x . . x . . x . . x . . x . . x . . x . . x . . x . . x
.
Lastly, my personal take:
.
Here is what I believe makes a baker create the best foam. And that is… ‘Imagination’. ‘Observation’. ‘Taking pleasure’. ‘Repetition’. 
.
In this particular case with whipping the finest foam, imagine how the actual air can be best incorporated.
.
For example:
After reading my guide above, you now know that sugar makes the foam stable, but at the same time, if too much too soon, it inhibits it, right? So observe the foam you’re whipping, & imagine the bubbles forming. Do you think your protein network is tangling well? Imagine the new air bubbles created – popPOPpop! Oh you need more sugar? OKAY! Let’s pour more sugar in! Let’s trap the next batch of air!
.
When the whisking is done, feel the pleasure in how the bowl has gotten heavy with so much air inside. You’d be really amazed with the difference in weight. Take pleasure in the confirming moment that ‘air’ is actually ‘heavy’. Smile at how well you’ve managed this task!
.
Every week, I whisk about 25 egg whites in one go for the 6 flourless chocolate cakes for my cake stall. I make this in a huge huge bowl. When I succeed with whisking the best foam, I notice that my cakes are taller, & it looks good. I also get a bigger yield from it which could mean a sale or no sale for me! ^^
.
Ofcourse, like anybody, my skills were not good in the beginning, but over the years, I’ve gotten better. Good enough to now be able to write this ‘how to’ article. With baking, practising, practising, practising is the only way to success. Like learning a piano perhaps or riding a bike, you’ve got to practise it repetitively to get better. You can’t expect it to be amazingly perfect the first time round. No one is a superman or a superwoman!
.
x . . x . . x . . x . . x . . x . . x . . x . . x . . x . . x . . x . . x . . x . . x

May 29th, 2011

How to make Hello Kitty & Pokémon cookies

.

Backtracking humongously here, but here are some pictures from before Easter.

~ . ~ . ~ . ~ .~ . ~ .~ . ~ .~ . ~ .~ . ~ .~ . ~

There are seven Japanese mums at my son’s school, & we all got together to raise funds for the Japan earthquake & tsunami relief. We did a sushi & cake sale in the school yard, & I of-course contributed by baking cookies & cakes.

.

Upon setting about doing this, I had a clear criteria to solve. Perhaps it’s the old graphic designer in me, but I love brainstorming. So here’s what I considered:

~ I knew I wanted a Japanese theme to them. ~ It had to appeal to primary school children & their mums. ~ It also must be time & cost effective for maximum return. (The going-rate for cake spendage is 20p to a £1 at a standard school cake sale, so for the pricing to be set so low, the cost of ingredients must stay minimal…) ~ And most importantly, explicitly with NO nuts as the school has a nut-free policy.

.

After a quick sesh with my thinking cap on, I figured the best way is to bake cookies but also add value to them by imprinting famous childrens characters. Hello Kitty to appeal to girls, & Pikachu (Pokémon) for boys. As for the cookie recipe, I used the tried & tested Nontan one that I wrote about previously on this blog.

.

To imprint the characters, here’s what I did:

  • 1. I found a line drawing that I like on the web.
  • 2. Then printed it out b&w to a size that I want.
  • 3. Layer a clear acetate sheet on top of print, secure the corners with sellotape.
  • 4. Using a thin black permanent marker pen, copy the design on to acetate. (Non-permanent will smudge as you do your cut out work.)
  • 5. Place acetate on cutting board, & carefully cut out the black lines. – The important thing to remember when cutting a stencil is that if there is a ‘perfect’ continual line, you have to break it to avoid cutting out the inside. It’s a bit difficult to explain, but think of the inner circle in letter ‘O’ for example. - And if you look at the bow on the kitty cookie below, you’d see that there I left gaps in the line to hold the inside.
  • 6. When you have finished making the stencil, place it on cut-out cookie dough & dust cocoa powder gently & most importantly faintly to avoid smudges. Carefully remove the stencil sheet off, then bake as per usual.

.

(I used my tart tin as a cookie mold to get the fluted rim.)

(Pre-packaged in a bag for quick sale. Small handmade Japan flag sticker for added touch & charity feel. Lucky that the Japan flag is just a red circle! I wouldn’t have done this if the flag design was complicated! ie; U.S.A!)

(Cookie came big in five inch diameter! But was sold only for a pound! Bargain!! If at my market, I would’ve sold them at £1.50 I reckon!)

.

I made about 55 of these, & they sold within 7 minutes. I didn’t anticipate that most mums would be buying more than one each. ~ I should’ve made more…!!? ^^

October 12th, 2010

Cake pan size conversion ~ The formula ~

cocoandme_muffin_tin

.
One of the many baking questions I get asked is how to scale a cake recipe to fit another size or shaped pan.
.
There is an universal formula you can use:
.
(volume of the preferred tin) ÷ (volume of the original tin)
.
x . x . x . x . x . x . x . x . x . x . x . x . x . x . x . x . x . x . x . x . x . x . x
.
For this, you need to find out the volume of the two tins.
The formulas to work out the volume of a pan according to shapes are the following:
.
ROUND
(3.14 x half the diameter x half the diameter x height)
.
SQUARE or RECTANGLE
(length x width x height)
.
NOVELTY CAKE TIN
First work out the volume of tin by weighing how much water goes in. Water is 1g = 1 cm³
(The mass of 1 cubic centimetre water at 3.98°c equal to a gram. (it’s the temperature at which it is at maximal density roughly). So we can use that number you’ve weighed as the measure of volume.
.
MULTI-CAVITY TIN (like a muffin pan)
Again, work out the volume by pouring water in one cavity, & multiply that with how many cavities there are. Weigh it in grams, & use that number as the volume.

.
x . x . x . x . x . x . x . x . x . x . x . x . x . x . x . x . x . x . x . x . x . x . x
.
Here are two examples:

.
To convert from an 8″ ROUND cake tin (with 2″ height) to 10″ ROUND cake tin (with 3″ height) you’d do this:
.
(3.14 x half the diameter x half the diameter x height) ÷ (3.14 x half the diameter x half the diameter x height)

.
(3.14 x 5 x 5 x 3) ÷ (3.14 x 4 x 4 x 2) = 2.34375
So here we now know that we need to multiply the recipe by 2.4 times.
.
But if the height of the pans are the same, use this simpler formula:
(dimension of preferred tin ÷ dimension of original tin) x (dimension of preferred tin ÷ dimension of original tin)
For example,
(10÷8) × (10÷8) = 1.25 x 1.25 = 1.5625
So here we now know that we need to multiply the recipe by 1.6 times.
.
_ . _ . _ . _ . _ . _ ._ . _ . _ ._ . _ . _ ._ . _ . _ ._ . _ . _ ._ . _ . _ ._ . _ .
.
To convert an 8″ ROUND cake tin A to 10″ SQUARE cake tin B (when height is the same):
.
(length x width) ÷ (3.14 x half the diameter of A x half the diameter of A)

.
(10 x 10 ) ÷ (3.14 x 4 x 4) = 1.99
So here we now know that we need to multiply the recipe by 1.99 times. (I like to round it to 2)
.
x . x . x . x . x . x . x . x . x . x . x . x . x . x . x . x . x . x . x . x . x . x . x
.
Please note:

– If both tins in question are of same height, you don’t need to measure the height for each.
– The examples are in inches, but of-course the same formula works in centimeters too!
– When I get long answers like 1.5625, I personally like to round it UP to 1.6.
– Although the oven temperature should remain the same for both occasions, the baking-time will change.
.
x . x . x . x . x . x . x . x . x . x . x . x . x . x . x . x . x . x . x . x . x . x . x
.
It’s all probably elementary bit of maths for you all, but for me it certainly isn’t! There is a reason why I’m a baker & not a mathematician…
June 24th, 2010

Stupendously easy homemade butter & fun buttermilk pancake

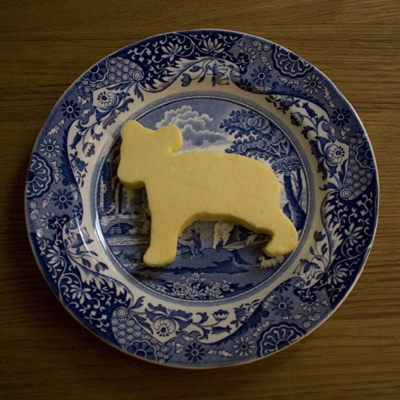
Coco&Me - Homemade butter in a shape of a bear (molded) - www.cocoandme.com(Bear cub – Homemade butter cut out with cookie cutter.)
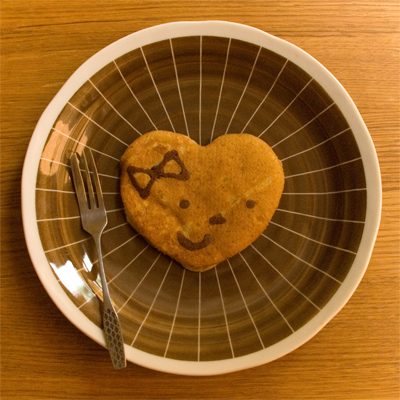
Coco&Me - Buttermilk Pancake recipe with step-by-step pictures of the process - heart motif - www.cocoandme.com(Heart shape buttermilk pancake)
.
About time for some recipes from yours truly. xx
.
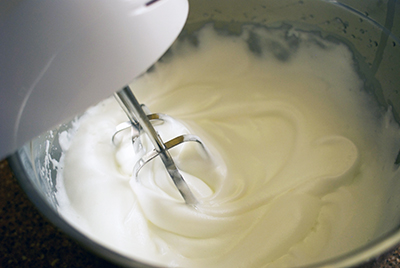
First, I would like to write about how easy it is to make butter in your very own home. Not just any butter, but a deliciously creamy one, quite unlike any that you’ve had before, I promise. And all from JUST one ingredient; double cream (& salt to taste), which you JUST over-whip until the liquid has separated & leaves you with the semi-solid, which is the butter (more precisely, butterfat). Stupendously easy right? Told you!! ^^
.
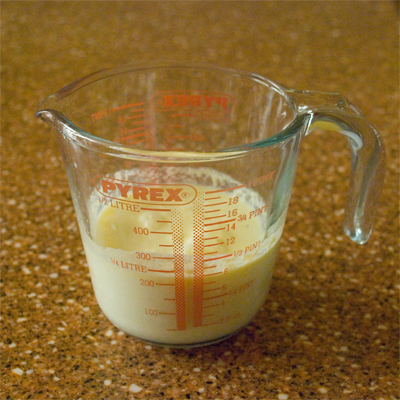
And here’s the revelation. The left over liquid is, guess what? Buttermilk!!!! So don’t throw it away because we are using it for our pancakes later.
Coco&Me - Homemade butter & buttermilk pancake recipe - www.cocoandme.com(Buttermilk extracted from double cream!!)
.
Here’s what you’ll need to make butter:

  • Double cream
  • Mixing bowl & hand-mixer (or Food processor)
  • Salt (try adding 0.5% of total butter to start with, & add more if you prefer)

.
And to make it:

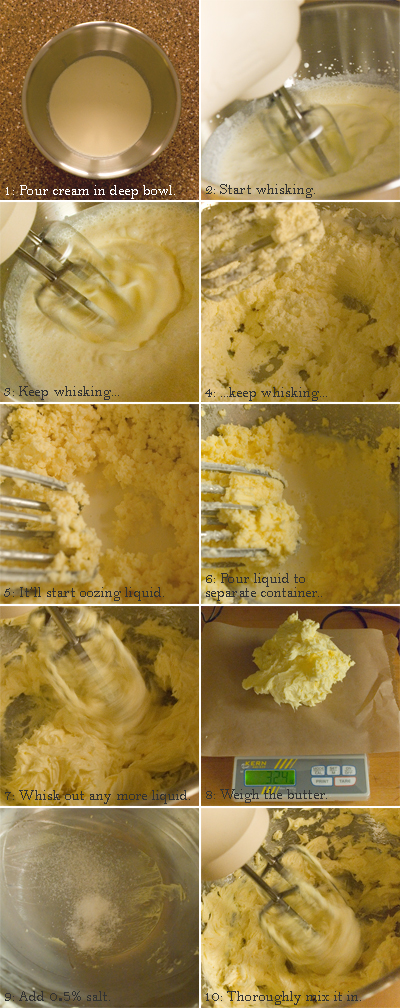
  • 1. Start whisking the double cream in a deep-walled mixing bowl. (… deep walled bowl is better as the liquid will spit like mad!)
  • 2. At first it will look like chantilly cream you’d use for cake decorating. Continue whisking.
  • 3. A while later it’ll start to curdle (looking like cottage cheese). Soon after, it will start oozing liquid.
  • 4. Whisk until it has broken in to two components, solid & liquid. The solid is very fresh butter & liquid, buttermilk.
  • 5. Collect the buttermilk for later use. Then whip the butter more to extract as much liquid.
  • 6. Weigh how heavy your lump of butter is, and calculate how much salt you’d like to incorporate.
  • 7. Vigorously work in the salt to the butter to ensure even distribution.

Coco&Me - Homemade butter & buttermilk pancake recipe - www.cocoandme.com
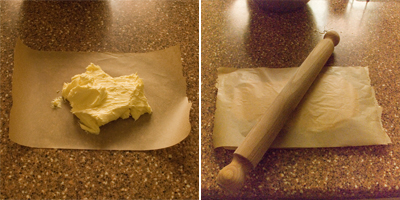
To store, you can just scoop it in a Tupperware & refrigerate, or, if you like, you can roll it to 1.5cm thickness or more in-between greaseproof paper like the picture below, then freeze it for a while (1-2 hours) to make it hard to cut shapes using cookie cutters!!! (… it is best to use simple shapes that don’t have intricate corners. Also, you might want to use a cooks’ blow torch to ease them out of the mold.)
Coco&Me - Homemade butter & buttermilk pancake recipe - www.cocoandme.com
Guide notes:

  • The double cream has to be fresh, not UHT or vegetable oil substitute.
  • Some recipes will say to ‘wash the butter’ at the end. It is done to wash out any residual buttermilk so that the butter keeps for longer. I have skipped this step because it’s an extra work that takes the fun away, but please feel free to do so.
  • Make sure to salt the butter AFTER you have collected the buttermilk. You wouldn’t want to flavour the buttermilk right?
  • Butter yield: From 600ml of double cream, I ended up with 324g of butter & 235ml of buttermilk.
  • This butter has a ‘cleaner’ note to the taste than shop-bought ones. And perhaps less yellow.
  • The science: Cream contains tiny globules of butterfat surrounded by membranes. By agitating the cream by whipping, the membranes of these globules break & the loosened butterfat chain together to form a solid mass = butter. For more information, please check out this website.

.
x . . . x . . . x . . . x . . . x . . . x . . . x . . . x . . . x . . . x . . . x . . . x
.
Next, let’s make some fun looking pancakes!
In the recipe below, I have used silicone egg rings to make shapely pancakes. And also had some fun drawing on them. Ofcourse, you can approach this the usual/ easier/ quicker way by just freehand scooping & pouring! – And as for the recipe itself, it produces very moist pancakes that is very (very) moreish, I can assure you it’ll disappear from your plate in nooooo time… Ever since I made this recipe, we always have buttermilk in our fridge for a quick fix up!
.
x . . . x . . . x . . . x . . . x . . . x . . . x . . . x . . . x . . . x . . . x . . . x
.
Buttermilk pancake recipe:
.
Ingredients:

  • Plain flour… 120g
  • Sugar… 40g
  • Baking powder… 5g
  • Baking soda… 3g
  • Egg… 1
  • Buttermilk… 200ml
  • Vanilla extract… a dash
  • Melted salted butter… 40g
  • Cocoa powder… roughly a teaspoon

You’ll need the following things:

  • Mixing bowl
  • Silicone egg rings
  • See-through lid that covers your frying pan
  • Optional: Maple syrup or icing sugar to serve

.
Method:

  • 1. First we prepare two separate bowls of ingredients;
    – – a: sifted dry ingredients: flour, baking powder & baking soda.
    – – b: mixed wet ingredients: egg, buttermilk, vanilla extract, but minus the melted salted butter which we will incorporate in step 3.
  • 2. Make a well in the middle of the dry ingredients & GRADUALLY pour in the wet ingredients, whisking all the time.
  • 3. When you have whisked the batter until it is not clumpy, pour in the melted butter & whisk it in.
  • 4. Next, pour some of the mixture in another small bowl, then add cocoa powder to colour it brown.
  • 5. Put the cocoa batter in a piping bag.
  • 6. Heat the pan on low.
  • 7. Grease the pan thinly with melted salted butter. (…using folded kitchen paper to smear it across is my choice of method.)
  • 8. Place the silicone egg ring on the pan.
  • 9. Pipe a simple design quickly using your cocoa batter.
  • 10. When the cocoa design has dried, pour the pancake batter in the egg-ring (…here, make sure it is just under half the height of your mold, as anything higher, the batter will flood out when frying).
  • 11. Place the lid on (…a glass lid would be best so that you can keep an eye on how the pancakes are doing).
  • 12. Wait until you start to see bubbles appear on the surface & the edges slightly cooked.
  • 13. Flip the pancake with the egg-ring still attached (…I find that flipping together with the mold ‘spill-free’).
  • 14. Fry until it browns (about under a minute).

Coco&Me - Buttermilk Pancake recipe with step-by-step pictures of the process - www.cocoandme.com
Guide notes:

  • This recipe does not work with milk as substitute for buttermilk. I tried & it came out edible, but not nearly as tasty as the proper buttermilk version. – I also did a test-run with milk that has been soured with lemon. It was much better than the ‘milk-only’ version, but nothing beats the real thing.
  • If you are using the silicone mold straight again, just give it a quick wipe with the kitchen towel to get rid of any residue.
  • Use the batter straight away. Never rest it. The reason for this has to do with the two leavening agents in this recipe:
    – Baking powder reacts to moisture & enlarges the carbon dioxide (air) within the batter. It expands upwards.
    – As for the baking soda, which expands sideways, primarily reacts with acidic components (such as buttermilk) to give off carbon dioxide that expand under temperature. For both agents, the reaction is immediate after being incorporated, so please don’t rest the batter or the carbon dioxide will start to dissipate, & it won’t rise so well.
    – Another point worth mentioning about these leavening agents is that you should not use aged stuff that’s been lying around in your store cupboard, as it won’t be as reactive, it’ll have a bitter taste, & you’d get a disappointing result.
  • I like using salted butter for this recipe. Salt is known for enhancing the flavours of the other ingredients, especially sweetness. I also like to grease the pan with the salted butter.
  • Silicone molds are the best. I tried metallic shapes such as standard cookie cutters, greasing the sides with butter then flouring, but the pancake sticks now & again & it does not give you consistent results. Also, complicated shapes should be avoided as they are finickity.

.
Some more designs:
.
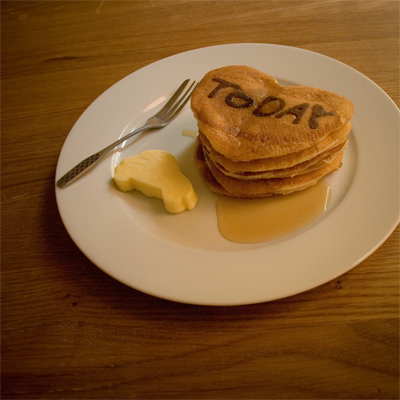
This one is an evolving message on a pancake as they eat! The surprise is right at the bottom!

Coco&Me - Buttermilk Pancake recipe with step-by-step pictures of the process - hidden message - www.cocoandme.comCoco&Me - Buttermilk Pancake recipe with step-by-step pictures of the process - hidden message - www.cocoandme.com(… With car-shaped butter!) You have to pipe the letters mirrored – which can get confusing!! (notice the ‘Y’ in ‘today’?)
.
And there’s the three bears:Coco&Me - Buttermilk Pancake recipe with step-by-step pictures of the process - bear motif - www.cocoandme.com.
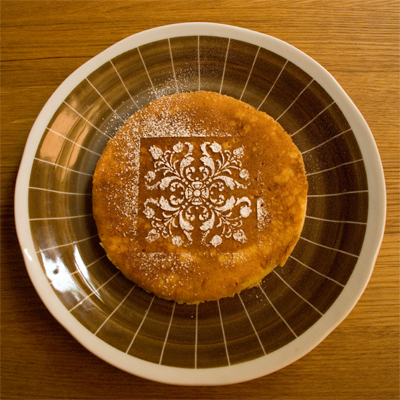
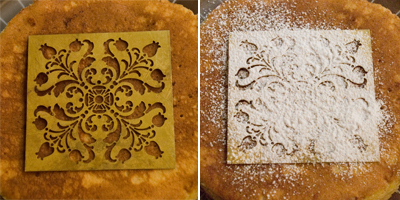
This one, I used my stencil to dust a bit of icing.Coco&Me - Buttermilk Pancake recipe with step-by-step pictures of the process - icing pattern - www.cocoandme.comCoco&Me - Buttermilk Pancake recipe with step-by-step pictures of the process - icing pattern - www.cocoandme.com.
More playing around…
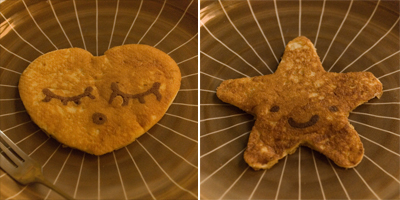
Coco&Me - Buttermilk Pancake recipe with step-by-step pictures of the process - heart & star motif - www.cocoandme.com.
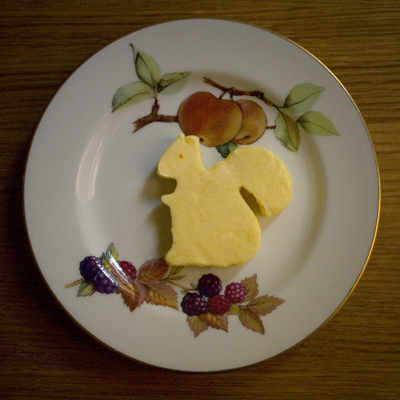
And finally, a picture of a squirrel butter, which ends my longest ever recipe post!!!!Coco&Me - Homemade butter in a shape of a squirrel (molded) - www.cocoandme.com
May 31st, 2008

Homemade vanilla extract

Homemade vanilla extract Recipe - Coco&Me(I made three bottles – with vodka, brandy & rum to experiment. In 5 weeks time I’ll know which one came out best!)
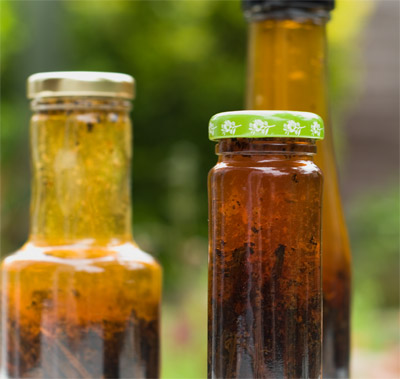
Homemade vanilla extract Recipe

(I used clear glass jars despite the “instructable” suggesting to use dark glass to protect the extract from direct sun exposure. I’ll put them in a dark cupboard instead!)
.
Do you have half-consumed bottles of vodka (or brandy or rum) sitting in your cupboard that’s been long forgotten about? Well, here’s an idea. You can infuse them with vanilla pods to concoct yourself a superior homemade vanilla extract.
.
Y’see, now that I’m walking around the house with a baby sling instead of partying like an animal (!?), I decided that I might aswell turn these forgotten alcoholic beverages to good use, by baking it in to cakes & stuff. Much more useful – having a boozy vanilla extract instead…
.

The supermarket price VS the cost to home-make:

A bottle of bog standard vanilla extract off the supermarket shelf can be pricey at around £4.00 for a measly 100ml. As for purchasing just ONE pod, it ranges from £1.44 for the cheapest to an extortionate £2.26.

.

I figured out that this project could turn out a tad expensive. The recipe requires 30g of pods (8 to 10 pods) to 250ml. Thats hell-of-a-lot of pods… If you buy pods off-the-shelf for this, it’s like over 14 pounds for the pods, then you gotta think of how much the alcohol would cost on top of that!

.
Luckily, my homemade brew costs a lot less in comparison, as my vanilla pods are cheap (I got mine from a wholesaler at £75 for 1kg), & as for the alcohol, I worked out that it costs just over £1 for 100ml. To make a 250ml, it’ll probably cost me just under 3 pounds.
.
For the recipe, I followed the “instructable” & its author’s website it links to. (“Instructable” is a website where passionate people share what they do & how they do it, & learn from others. – I love whiling away my time browsing the often bizarre & original food ‘instructables’. The recent ‘I-wish-I-came-up-with-that-idea’ I found was to use a playdough extruder to make long square rods of cookie dough to make pixel patterned cookies!!)
.
The instructable goes to great lengths to document the recipe for vanilla extract, & I’m not even gonna try to emulate.

.

But here’s the RECIPE, nut-shell version:
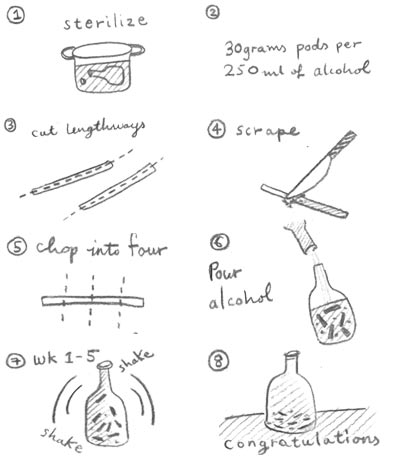
Homemade vanilla extract Recipe

  • 1. Sterilize the bottle(s) by boiling them for 10 minutes.
  • 2. Work out how many pods you need. It’s 30 grams (8-10 beans) per 250 ml of 40% alcohol.
  • 3. Split the pod lengthways, scrape the beans & put both pod-skin & beans in to the bottle. Here, it’s best to chop the pod-skin in to fourths so it stays submerged in the alcohol.
  • 4. Fill with alcohol (vodka most recommended, else, brandy or rum).
  • 5. Tightly shut the lid & vigorously shake the bottle.
  • 6. Shake everyday for the first week. And in weeks 2, 3 & 4, shake the bottle a few times a week.
  • 7. Week 5: Ta-daaa! You’re now a proud owner of alot of vanilla extract!

Note: Shake the bottle if you want the seeds/ beans in your recipe. And top-up with more alcohol if the pod-skin gets exposed. After 6 months you can take the pod-skins out as the extraction has finished by then.

.

UPDATE 17.07.08

using vodka for the extraction was best. The rum/ brandy, the distinct smell of the alcohol overpowered the delicate vanilla scent. Read the results of the vanilla extract experiment here.

« Previous Entries