June 14th, 2012

Super Scones (the science of baking the perfect scone)

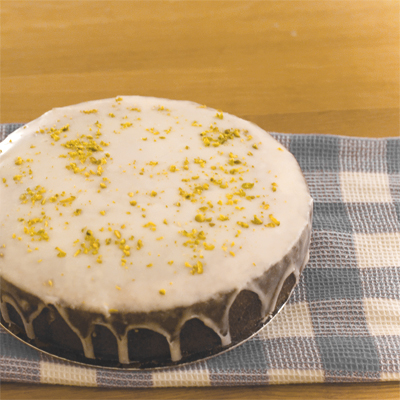
(I didn’t have time to buy clotted cream on this occasion… but full-on sloshing of jam will just have to do! ^^ Personally, I like to drink cold milk with my scones rather than tea.)

.

x . . x . . x . . x . . x . . x . . x . . x . . x . . x . . x . . x . . x . . x . . x . . x

.

♡♡♡ It’s recipe time!! ♡♡♡

.

This time, I would like to share with you my take on scones. How I think it should taste & how it should look.

.

Scones are honest, no-frills things aren’t they, there’s no fancy decorations to hide any flaws. And it’s because of that, that it’s all the more important to execute the baking well. When it comes out of the oven, they all ought to look pretty much uniform, & not collapsed lopsided or look like a collection of rocks. There should definitely be a side ways jaggedy break going through the middle, made from when the dough had risen, hinting at how deliciously soft the inside might be like. (Is there a name for this break? The Japanese call it ‘the wolf’s mouth’!)

.

I think it should look unfussy & inviting, perhaps even goes as far as being evocative of the laid-back cream teas served by local ladies in pinnies down in the depths of devonshire countryside.

.

Upon creating any of my own recipes, I always set about understanding the ingredients involved & how each plays its part. You know me, I love puzzing up my puzzler when concerned with baking. Afterall “baking is a science” & it’s my firm belief that if you understand the logic, you’re more likely to get a successful result. Not only that, when you vanish the question marks in your head, you would enjoy baking better too! – So here’s what I know about scone science in a Q&A format.

.

x . . x . . x . . x . . x . . x . . x . . x . . x . . x . . x . . x . . x . . x . . x . . x

.

Q: Why do we rub in the butter to the flour?

We rub in the butter to coat the flour so that it doesn’t soak up the wet ingredients as much as if otherwise. The butter fat acts as a barrier around the flour to stop gluten from developing too much. Gluten in cakes, as we know, creates structure which is important, but it also makes the cake firmer.

.

Q: Why do we use cold butter?

Now, this is perhaps ‘the’ crucial part of the recipe. Utilize this bit of info & you will undoubtably bake super scones. People who know how puff pastry works will understand this better I think.

.

So you think that it’s the baking powder that is doing all that lifting action right? No siree, there’s a bit more to it. – When the solid bits of butter encased in dough is rapidly heated in the oven, the water contents of the butter evaporates in to air bubbles, & it consequently lifts the gluten structure.

.

For this reason, you know not to handle the dough with warm hands so as not to melt the butter prior to baking. And as cumbersome as it may be, we use the back of the fork (or even better with special pastry blenders) to rub in the butter.

.

This bit of science also answers why the recipe has a high oven temperature setting. We want the butter to powerfully evaporate in the extreme heat, rather than slowly melt & sink in to the flour & wet it, creating excess gluten.

.

Also, here’s a top tip: if you are baking in the summer, it may be an idea to cool your bowl & utensils in the fridge first! And while you are working, you can put an ice pack under the bowl!

www.cocoandme.com - Coco&Me - Coco and Me - ice pack - scone recipe

.

Q: Why do we rest the dough in the fridge?

Part of the reason lies in the above answer = that the butter within has to be kept cold. Another worthy reason is to relax the gluten strands, one, to produce fluffy texture, & second, to avoid shrinking when it bakes (the rested dough is less elastic).

.

Q: What does milk do in baking?

Milk has a a particular & richer mouthfeel, what with its certain subtle sweetness, thickness & slight acidity.  The liquidity delvelops gluten when mixed with flour & structures the baked goods. And the natural sugar in milk lactose, aswell as the fat, tenderizes the baked goods & makes for moist texture without it being soggy. Milk in baked goods also extends the shelf-life. And the sugar interacting with protein browns the baked goods more readily too.

.

Q: Why does your recipe call for the egg wash to be done twice?

Two egg washes with a rest in the fridge in-between to dry the first wash, will darken the top of the scones better & make the scones aesthetically more pleasing. It also gives it a shiny surface & is very smooth to the touch. I personally think that it helps to make the scone look one-rank up & a little more sophisticated.

.

So the key tips to making perfect scones are as follows:

  • Use cold butter.
  • Don’t dawdle. Work efficiently to avoid butter melting in room temperature.
  • Rest the dough in the fridge for more than 30 minutes.
  • Bake at high oven temperature.

.

After all the above science-y chalk-talk, I’m probably scaring you away from making these, but please fear not!! Making these scones, you’d never look back to purchase one in the shops! I am so super happy with this recipe! ^^ It is actually super easy, super amazing, super moreish!

.

x . . x . . x . . x . . x . . x . . x . . x . . x . . x . . x . . x . . x . . x . . x . . x

.

Coco&Me’s super scones recipe

(Yield: It depends on the size of your cutters obviously, but I can make about 7 scones, using my 6.8cm round cutter)

.

Ingredients:

90g salted butter ( I like using salted butter. If using unsalted, also add a pinch of salt.)

300g plain flour

15g baking powder

45g caster sugar

125ml cold milk

egg yolk for brushing the top surface

.

Method:

  • 1. First thing first, cut 90 grams of butter into tiniest cubes possible & place in a large, deep-walled mixing bowl. Refrigerate this bowl with the butter until needed.
  • 2. Sieve in 300 grams of flour. (If using unsalted butter, add the pinch of salt in this step.)
  • 3. Using the back of the fork (or a special pastry blender if you have one), cut the butter in to the flour. Try to work quickly to avoid the butter from melting. (If you think that the butter is getting soft, place the bowl in the fridge until firm & then work again.Or try my tip & place an ice-pack underneath your bowl.)
  • 4. When the butter lumps are as small as a grain of rice, sieve in 15 grams of baking powder.
  • 5. Next, toss in the 45 grams of sugar.
  • 6. Pour in 125ml of milk & quickly work it in to the flour mixture to form a ball of dough. Here, use a spatula for most of the work, & then your hands at the end only to gather it in to a ball. Next, knead it until it is less bumpy. But also keep in mind to never over-work the dough so as not to produce gluten.
  • 7. Cling film it tightly & refrigerate for more than 30 minutes.
  • 8. After the 30 minutes rest, flour the work surface. Using the rolling pin, roll the dough flat to 2.5 to 3cm height.
  • 9. Then proceed to cut discs out. Very lightly flour the insides of the round cutter, & with equal force from straight above, cut in to the dough. Never twist the cutter or else you will get a lopsided scone.
  • 10. Place the discs on to the baking tray lined with baking sheet. Here, when moving the discs, never ever touch the cut sides.
  • 11. Brush the top surface with loosened egg yolk. Brush to the edges, but be careful not to let the egg wash drool down the sides.
  • 12. Rest it in the fridge again until the egg wash is dry to the touch (approximately 10 minutes).
  • 13. In the meantime, proceed to pre-heat the oven to 210 degrees centigrade.
  • 14. Brush on the egg wash for the second time.
  • 15. Place tray in the oven for about 10 to 12 minutes (dependent of size of your scones). Turn the oven sheet half way baking to ensure even heat/ even rise.
  • 16. Best served warm!! xx

.

www.cocoandme.com - Coco&Me - Coco and Me - super scones recipe with step by step pictures

(By the way, it’s best to align the scone discs diagonally on the baking tray. The hot oven air flows better to each & individual discs better than if the discs were horizontally aligned.)

.

(Did you know, the proper way to split open the baked scone is not with a knife but by fingers, right where the crack is!)  

.

Lastly, scone trivia!

Do you spread the jam above or under the clotted cream? Cornwall has the jam underneath & Devon has theirs above (I’m a jam on top girl by the way).


April 4th, 2011

Children’s story book with honey buzz buzz cake recipe

(plus a general update at the end)

.

x . x . x . x . x . x . x . x . x . x . x . x .x . x . x .x . x . x . x . x . x . x . x . x

Please note:

I am not going to be at the market on the 9TH & THE 30TH OF APRIL! I’m sorry for the inconvenience it may have caused to your plans… Sorry.

x . x . x . x . x . x . x . x . x . x . x . x .x . x . x .x . x . x . x . x . x . x . x . x

.

www.cocoandme.com - Coco&Me - Coco & me - Honey buzz buzz cake recipe with step by step process pictures

.

Hello everyone!

I’m going to share with you today a cake recipe that is not mine, but from one of my family’s favourite & thumbed through Japanese children’s story book we have at home.

.

If you’re a seasoned reader of this blog, you’d know that this is the second time that I’ve written about a recipe from a children’s book (read the first one here). I love collecting (good) recipe books to add to my huge library of anything baking related, & that obsession extends to the choice of books I buy for my children! Biased I know (!), but why not? ^^ I would love for my children to like baking as much as I do. And in fact, let me tell you, my son’s first ever cinema film was Pixar’s Ratatouille back in 2007, because I wanted food to be part of his milestone experience. Although… then again, maybe the truth was that we went because I myself simply couldn’t wait ’til it came out on DVD…? ;) Lol.

.

www.cocoandme.com - Coco&Me - Coco and me - Kuma kun no hachimitsu bun bun keiki children's recipe book- Boy bear's honey buzz buzz cake book

The book title is “クマくんのはちみつぶんぶんケーキ” (Kuma-kun no hachimitsu buun buun keiki) which translates to something like “Boy bear’s honey buzz buzz cake”. It is published in 1994, & is written by Machiko Yagyu.

.

The story is about a bear who wants to make the honey buzz buzz cake (what a great name!), so helps out at Mrs.Bee’s to get some honey for it. On return home, he meets a family of pigs & he invites them around for a cake party. Here, there is the highlight joke of the book, when the piglets can’t say part of the cake name “buun buun” (Japanese way of saying buzz buzz), & says “buu buu” (Japanese way of saying oink oink). If you’re a Japanese kid, it is the most hilarious bit I assure you.

.

www.cocoandme.com - Coco&Me - Coco and me - Honey buzz buzz cake recipe book - sample page

(the illustrated recipe page.)

www.cocoandme.com - Coco&Me - Coco and me - Honey buzz buzz cake recipe book - sample page

(Boy bear with his bee & piggie friends have a tea party outside with pink tablecloth. – For my cake picture at the top of this post, I followed Boy bear’s choice with pink tablecloth! But I’d like to think I’m one up on him for the beehive-like hexagon design! )

.

Boy bear’s honey buzz buzz cake is delightfully homesome. There is one caution though – as it bakes in the oven, the aroma of honey will waft tantalizingly, teasing us in to a drool monster by the time it is ready. And if you only knew how scrumptious it really is, it’s hard not to dig in as soon as it is out of the oven. Trust a honey-lovin’ bear to know a seriously good honey cake I say!

.

Combined with the ease of the recipe, I have made this cake a number of times without fail, even with the children! – – Although, as you can see from the chaotic pictures below, at times there were too many hands wanting to do the same thing, & it does get messy… When baking with children, best to take a deep breath & not be too fussy I suppose, so long as they’ve washed their hands! – (I’m a hygiene freak!)

.

About the science behind the recipe:

Honey has the ability to attract & hold moisture (hygroscopy). This makes the cake moist. Honey is also relatively acidic, & together with the sour cream which is also an acidic ingredient, it tenderizes the gluten formed in the batter.

.

The bicarbonate of soda in the recipe reacts to the acidic ingredients & produces carbon dioxide gas which lifts the cake upwards as it tries to escape. During the time in the oven, the flour gluten structures ‘pillars’ that hold the cake in it’s risen height. A noteworthy point here though is that the bicarbonate of soda starts doing it’s magic at 80 degrees+ (wiki), so you’d think that you would have time to prepare leisurely, but as the recipe also calls for baking powder which reacts straight away from when in contact with moisture (the batter), you will be required to work quick once the BP is mixed in.

.

You might have noticed that the oven temperature is set at 140 degrees compared to the usual 180. That’s because honey caramelizes at a lower temperature than sugar, & it browns more than baked cakes made with granular sugar. The lower oven temperature will prevent the cake from over-browning.

.

For this cake recipe, I recommend using ‘clear’ honey with all-round taste, & NOT any of the more distinctive bold flavoured ones. I once tried baking this cake with eucalyptus honey, & it was not good. If this cake recipe works for you, perhaps next time play around with different honeys – the amount of fructose honey has is different in every one of them & subsequently the sweetness too will differ.

.

One last point – don’t feed honey to children under the age of one – honey has high fructose content, & the botulinum spores in it may be hazardous.

.

x . x . x . x .x . x .x . x .x . x .x . x .x . x .x . x .x . x .x . x .x . x .x . x

www.cocoandme.com - Coco&Me - Coco & Me - Honey buzz buzz cake - recipe step by step process

.

“Boy bear’s honey buzz buzz cake” Recipe:

.

Ingredients:

  • 140g of unsalted butter
  • 140cc/ml of clear honey
  • 140g of sour cream (or if not, double cream apparently, but I have to admit I never tried)
  • 2 medium sized eggs
  • 200g of plain flour
  • 7g of baking powder
  • 2g of bicarbonate of soda
  • 25g plus of almond flakes
  • Icing sugar to dust the top

.

Prepare:

  • an 8 inch (20cm) spring-form cake tin. Butter the sides & the bottom, then line it with baking paper.
  • preheat the oven to 140 degrees.

.

Method:

.

  • 1. Cube the unsalted butter & microwave until soft. (I recommend microwaving in 10 second increments & checking that you haven’t over-melted it. Here, ‘soft’ is when you can easily dip your finger in to it & it feels soft like mayonnaise.
  • 2. Whisk the butter to incorporate air. Do it until the butter is lighter in colour.
  • 3. Add 140cc of clear honey. Thoroughly mix it in.
  • 4. Add 140 grams of sour cream (or double cream). Thoroughly mix it in.
  • 5. Add 2 medium sized eggs. Thoroughly mix it in.
  • 6. Sift the dry ingredients in. 200 grams of plain flour, 7 grams of baking powder & 2 grams of bicarbonate of soda.
  • 7. Fold it in.
  • 8. Pour the batter in to the cake tin & spread it out nicely.
  • 9. Sprinkle 25 grams of flaked almonds.
  • 10. Sieve icing sugar on top. Here, sieve more than you think it requires!)
  • 11. Place in pre-heated oven of 140 degrees for 50 to 60 minutes, or until your cake-skewer comes out clean.

.

Coco&Me - Coco & Me - www.cocoandme.com - Honey Buzz Buzz Cake recipe with step by step process pictures

.

x . x . x . x . x . x . x . x . x . x . x . x .x . x . x .x . x . x . x . x . x . x . x . x

.

A little update on how things are doing:

.

Exactly a week after the Japan earthquake & tsunami, my daughter S turned three. That Sunday, we celebrated with a small party. The birthday cake was our family’s one & only option for birthdays, which is the genoise cake with cream & strawberry. It was put together very quickly on that Sunday morning, while chaotically tidying the house before the guests arrive. You could probably tell the stress on my face in the first picture on the left! Lol!

.

Last week, there was a little incident when our son ‘I’ turned out to be a bit of a fundraiser himself. He handed out ten of the Japan charity badges to his class-mates without my knowing, & asked them to bring one pound each. He meant well I know, but asking for money from children is not good, so I emailed the parents to tell them what happened & tried to recover the badges. Nice thing about it was that most parents just donated money instead of returning, & so in the end, my son raised eleven pounds! – Upon this incident, I realized that our son is perhaps just as affected by the news of Japan as I am…, & wanted to help. Perhaps I ought to have been a bit more careful when watching the news on telly…

.

There’s two bits of news:

One: all donations from the badge sales & from the donation box on my stall will go to THE RED CROSS from now on. They are doing such a fantastic job out there. Subsequently, I am now going to shut down the fundraising page I set up 3 weeks ago on First Giving for the Save The Children charity. May I take this final opportunity to thank once again to those of you who have donated! Thank you!! xoxo You are all very special people…! I love you!

The total fund raised is… (drum rolls please…!!) a whopping 3,699 dollars! Woohoo! Yay, baby!!!

.

Two: As I wrote at the beginning of this post, I will not be at the market on the 9th & the 30th of April. The first one because I can’t get child-care, & the second date, because it is my 35th birthday!!! ^^ Also, it’s because the day before, the 29th is the Royal wedding, & my road is doing a street party & I’m not one to miss it! ^^

.

June 24th, 2010

Stupendously easy homemade butter & fun buttermilk pancake

Coco&Me - Homemade butter in a shape of a bear (molded) - www.cocoandme.com
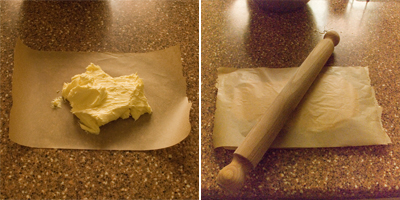
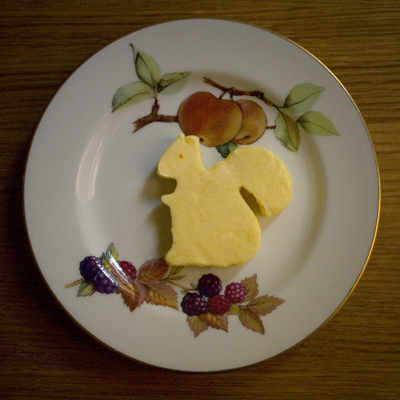
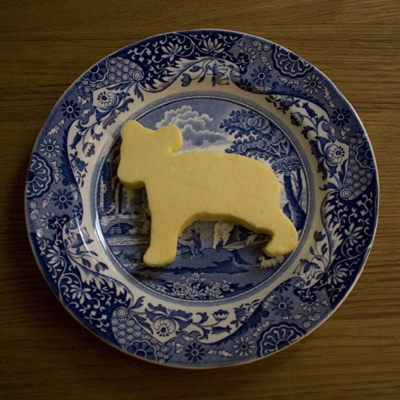
(Bear cub – Homemade butter cut out with cookie cutter.)
Coco&Me - Buttermilk Pancake recipe with step-by-step pictures of the process - heart motif - www.cocoandme.com
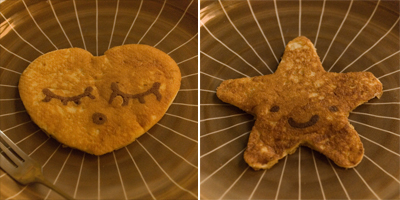
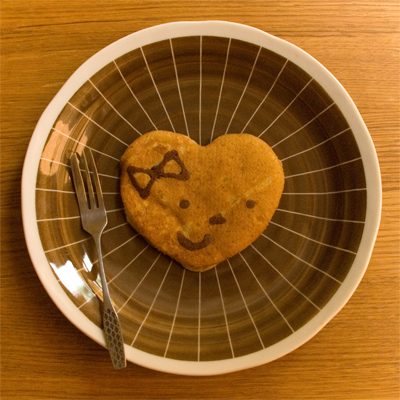
(Heart shape buttermilk pancake)
.
About time for some recipes from yours truly. xx
.
First, I would like to write about how easy it is to make butter in your very own home. Not just any butter, but a deliciously creamy one, quite unlike any that you’ve had before, I promise. And all from JUST one ingredient; double cream (& salt to taste), which you JUST over-whip until the liquid has separated & leaves you with the semi-solid, which is the butter (more precisely, butterfat). Stupendously easy right? Told you!! ^^
.
And here’s the revelation. The left over liquid is, guess what? Buttermilk!!!! So don’t throw it away because we are using it for our pancakes later.

Coco&Me - Homemade butter & buttermilk pancake recipe - www.cocoandme.com
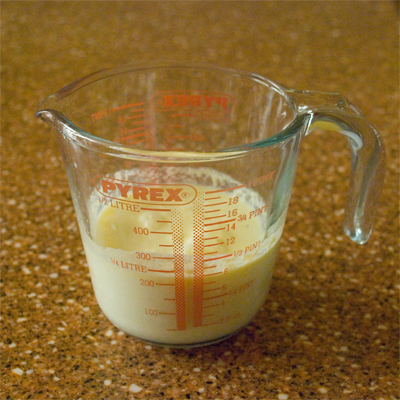
(Buttermilk extracted from double cream!!)
.
Here’s what you’ll need to make butter:

  • Double cream
  • Mixing bowl & hand-mixer (or Food processor)
  • Salt (try adding 0.5% of total butter to start with, & add more if you prefer)

.
And to make it:

  • 1. Start whisking the double cream in a deep-walled mixing bowl. (… deep walled bowl is better as the liquid will spit like mad!)
  • 2. At first it will look like chantilly cream you’d use for cake decorating. Continue whisking.
  • 3. A while later it’ll start to curdle (looking like cottage cheese). Soon after, it will start oozing liquid.
  • 4. Whisk until it has broken in to two components, solid & liquid. The solid is very fresh butter & liquid, buttermilk.
  • 5. Collect the buttermilk for later use. Then whip the butter more to extract as much liquid.
  • 6. Weigh how heavy your lump of butter is, and calculate how much salt you’d like to incorporate.
  • 7. Vigorously work in the salt to the butter to ensure even distribution.

Coco&Me - Homemade butter & buttermilk pancake recipe - www.cocoandme.com
To store, you can just scoop it in a Tupperware & refrigerate, or, if you like, you can roll it to 1.5cm thickness or more in-between greaseproof paper like the picture below, then freeze it for a while (1-2 hours) to make it hard to cut shapes using cookie cutters!!! (… it is best to use simple shapes that don’t have intricate corners. Also, you might want to use a cooks’ blow torch to ease them out of the mold.)
Coco&Me - Homemade butter & buttermilk pancake recipe - www.cocoandme.com
Guide notes:

  • The double cream has to be fresh, not UHT or vegetable oil substitute.
  • Some recipes will say to ‘wash the butter’ at the end. It is done to wash out any residual buttermilk so that the butter keeps for longer. I have skipped this step because it’s an extra work that takes the fun away, but please feel free to do so.
  • Make sure to salt the butter AFTER you have collected the buttermilk. You wouldn’t want to flavour the buttermilk right?
  • Butter yield: From 600ml of double cream, I ended up with 324g of butter & 235ml of buttermilk.
  • This butter has a ‘cleaner’ note to the taste than shop-bought ones. And perhaps less yellow.
  • The science: Cream contains tiny globules of butterfat surrounded by membranes. By agitating the cream by whipping, the membranes of these globules break & the loosened butterfat chain together to form a solid mass = butter. For more information, please check out this website.

.
x . . . x . . . x . . . x . . . x . . . x . . . x . . . x . . . x . . . x . . . x . . . x
.
Next, let’s make some fun looking pancakes!
In the recipe below, I have used silicone egg rings to make shapely pancakes. And also had some fun drawing on them. Ofcourse, you can approach this the usual/ easier/ quicker way by just freehand scooping & pouring! – And as for the recipe itself, it produces very moist pancakes that is very (very) moreish, I can assure you it’ll disappear from your plate in nooooo time… Ever since I made this recipe, we always have buttermilk in our fridge for a quick fix up!
.
x . . . x . . . x . . . x . . . x . . . x . . . x . . . x . . . x . . . x . . . x . . . x
.
Buttermilk pancake recipe:
.
Ingredients:

  • Plain flour… 120g
  • Sugar… 40g
  • Baking powder… 5g
  • Baking soda… 3g
  • Egg… 1
  • Buttermilk… 200ml
  • Vanilla extract… a dash
  • Melted salted butter… 40g
  • Cocoa powder… roughly a teaspoon

You’ll need the following things:

  • Mixing bowl
  • Silicone egg rings
  • See-through lid that covers your frying pan
  • Optional: Maple syrup or icing sugar to serve

.
Method:

  • 1. First we prepare two separate bowls of ingredients;
    – – a: sifted dry ingredients: flour, baking powder & baking soda.
    – – b: mixed wet ingredients: egg, buttermilk, vanilla extract, but minus the melted salted butter which we will incorporate in step 3.
  • 2. Make a well in the middle of the dry ingredients & GRADUALLY pour in the wet ingredients, whisking all the time.
  • 3. When you have whisked the batter until it is not clumpy, pour in the melted butter & whisk it in.
  • 4. Next, pour some of the mixture in another small bowl, then add cocoa powder to colour it brown.
  • 5. Put the cocoa batter in a piping bag.
  • 6. Heat the pan on low.
  • 7. Grease the pan thinly with melted salted butter. (…using folded kitchen paper to smear it across is my choice of method.)
  • 8. Place the silicone egg ring on the pan.
  • 9. Pipe a simple design quickly using your cocoa batter.
  • 10. When the cocoa design has dried, pour the pancake batter in the egg-ring (…here, make sure it is just under half the height of your mold, as anything higher, the batter will flood out when frying).
  • 11. Place the lid on (…a glass lid would be best so that you can keep an eye on how the pancakes are doing).
  • 12. Wait until you start to see bubbles appear on the surface & the edges slightly cooked.
  • 13. Flip the pancake with the egg-ring still attached (…I find that flipping together with the mold ‘spill-free’).
  • 14. Fry until it browns (about under a minute).

Coco&Me - Buttermilk Pancake recipe with step-by-step pictures of the process - www.cocoandme.com
Guide notes:

  • This recipe does not work with milk as substitute for buttermilk. I tried & it came out edible, but not nearly as tasty as the proper buttermilk version. – I also did a test-run with milk that has been soured with lemon. It was much better than the ‘milk-only’ version, but nothing beats the real thing.
  • If you are using the silicone mold straight again, just give it a quick wipe with the kitchen towel to get rid of any residue.
  • Use the batter straight away. Never rest it. The reason for this has to do with the two leavening agents in this recipe:
    – Baking powder reacts to moisture & enlarges the carbon dioxide (air) within the batter. It expands upwards.
    – As for the baking soda, which expands sideways, primarily reacts with acidic components (such as buttermilk) to give off carbon dioxide that expand under temperature. For both agents, the reaction is immediate after being incorporated, so please don’t rest the batter or the carbon dioxide will start to dissipate, & it won’t rise so well.
    – Another point worth mentioning about these leavening agents is that you should not use aged stuff that’s been lying around in your store cupboard, as it won’t be as reactive, it’ll have a bitter taste, & you’d get a disappointing result.
  • I like using salted butter for this recipe. Salt is known for enhancing the flavours of the other ingredients, especially sweetness. I also like to grease the pan with the salted butter.
  • Silicone molds are the best. I tried metallic shapes such as standard cookie cutters, greasing the sides with butter then flouring, but the pancake sticks now & again & it does not give you consistent results. Also, complicated shapes should be avoided as they are finickity.

.
Some more designs:
.
This one is an evolving message on a pancake as they eat! The surprise is right at the bottom!
Coco&Me - Buttermilk Pancake recipe with step-by-step pictures of the process - hidden message - www.cocoandme.comCoco&Me - Buttermilk Pancake recipe with step-by-step pictures of the process - hidden message - www.cocoandme.com
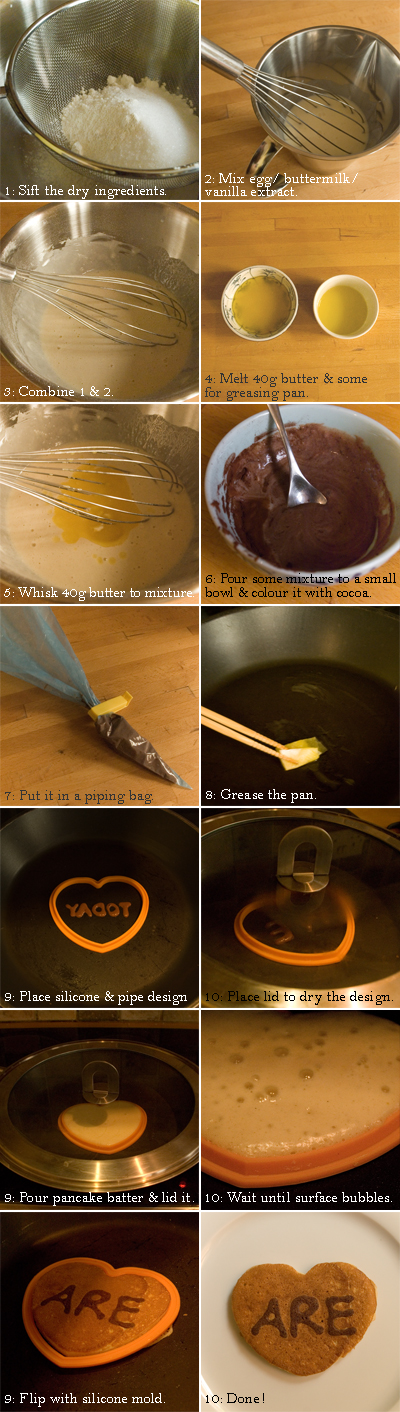
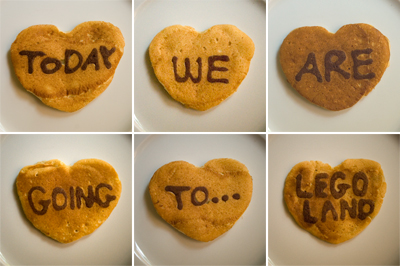
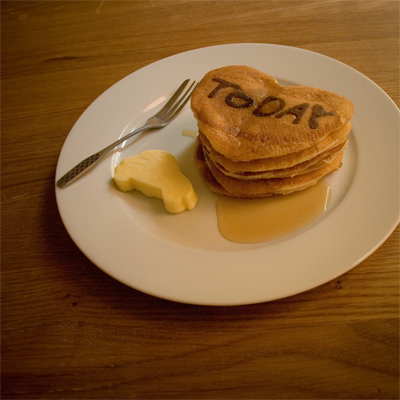
(… With car-shaped butter!) You have to pipe the letters mirrored – which can get confusing!! (notice the ‘Y’ in ‘today’?)
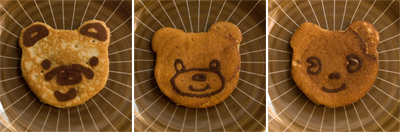
.
And there’s the three bears:Coco&Me - Buttermilk Pancake recipe with step-by-step pictures of the process - bear motif - www.cocoandme.com.
This one, I used my stencil to dust a bit of icing.Coco&Me - Buttermilk Pancake recipe with step-by-step pictures of the process - icing pattern - www.cocoandme.comCoco&Me - Buttermilk Pancake recipe with step-by-step pictures of the process - icing pattern - www.cocoandme.com.
More playing around…
Coco&Me - Buttermilk Pancake recipe with step-by-step pictures of the process - heart & star motif - www.cocoandme.com.
And finally, a picture of a squirrel butter, which ends my longest ever recipe post!!!!Coco&Me - Homemade butter in a shape of a squirrel (molded) - www.cocoandme.com

January 15th, 2010

Baked cheesecake with embossed pattern

(with step-by-step with pictures)

.

www.cocoandme.com - Coco&Me - Baked Cheese cake biscuit base recipe with making process pictures/ images - with embossed pattern of unicorn & squirrel
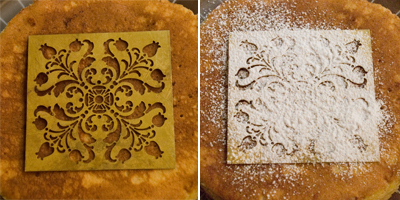
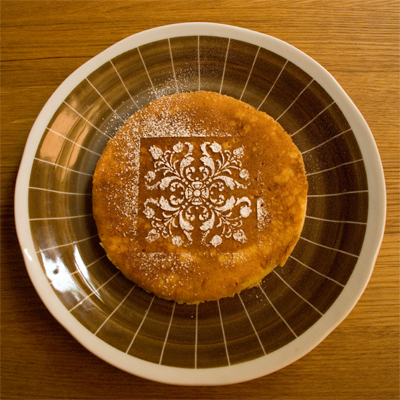
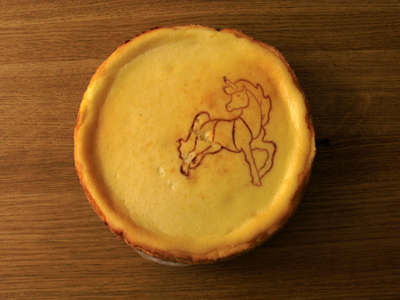
(…with unicorn pattern embossed)

.

www.cocoandme.com - Coco&Me - Baked Cheese cake biscuit base recipe with making process pictures/ images - with embossed pattern of unicorn & squirrel(It is ultra c ♥ r ♥ e ♥ a ♥ m ♥ y & the texture is melt-in-your mouth like a soufflé!)

.

x . x x . x x . x x . x x . x x . x x . x x . x x . x x . x x . x x . x x .

.

This must be one of the most easiest of cake recipes!

  • It doesn’t involve separating eggs.
  • Nor whisking any time-delicate meringues, so you can take as much time leisurely making it.
  • There’s minimal washing-up to do too, as all the mixing happens in one bowl.
  • As for the biscuit base, you can further avoid washing-up by simply massaging the store-bought biscuits & butter in a food bag! Of course you can do it the usual way by using bare hands, but do it my way, you’d also avoid getting unpleasant biscuit-mash in your nails & your fingers buttery.^^ On that same note, I also suggest cling-filming the 3 middle fingers when pressing down the biscuit to the base.
  • There is no adventurous water-bath method to contend! (Some cheesecake recipes use the water-bath method to cook it gently so that it doesn’t crack, but I for one have a long hate-relationship with the method ever since the water seeped in to my cakes via the removable bottom in many occasions in the past…)

.

The texture of the cheesecake is creeeeeamy! I managed this by tweaking the balance of the ingredients so that it uses tons of double cream/ sour cream/ cream cheese, but as little as possible of flour (… flour creates the ‘structural pillar’ that holds the cake in the inflated spongier shape – please read my blog-entry on flour for explanation of this).
.

I sell my cheesecakes down at the market. And I’m happy to say that it’s been a hit no problem. It’ll always definitely be in my line-up because it has acquired a bit of a following ^^

– Like the lady who said: “I used to buy your flour-less chocolate cake all the time, but now I converted to always buying the cheesecake!” And the spectacled-man who’d get disappointed if it’s sold-out. There’s also my favorite tomato-seller girl who’ve been buying the whole cake for 4 weeks in a row, but says she never gets to eat as much as she’d like to because her boyfriend & her family loves it too!

.

The pattern:

When I first started selling the cheesecake, it had no pattern on top. Although I was perfectly confident with the taste, I felt the presentation needed ‘Something’. Y’know, that ‘Something special’ for the wow factor & for the customer to justify their purchase. For a long while I was thinking of a solution to this; & I was enquiring around to see if I could get an iron stamp that I could heat & emboss/ burn a pattern with. But, one, it is difficult to get hold of, & secondly it’s never in a pretty pattern!

– So next I thought what about stenciling with cocoa powder? But maybe not. It’ll be too smudgy…

– Then it occurred to me while I was embossing my chocolate bird tart. Ah! Just invert it! Cocoa powder & cookie cutter! Simply dab cocoa powder on the blunt end of the cookie cutter, then tap off the excess & stamp the cake!
.

www.cocoandme.com - Coco&Me - Baked Cheese cake biscuit base recipe with making process pictures/ images - with embossed pattern of unicorn & squirrel
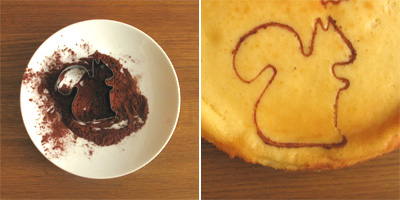
(I get asked A LOT at the market on how I do it!)

www.cocoandme.com - Coco&Me - Baked Cheese cake biscuit base recipe with making process pictures/ images - with embossed pattern of unicorn & squirrel
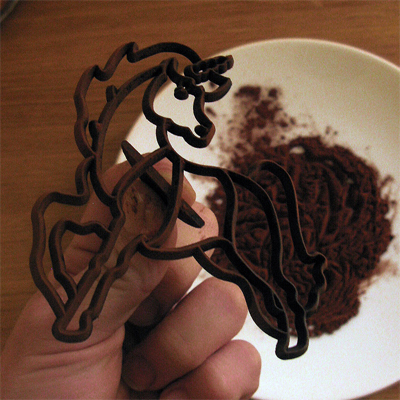
(My favorite stamp! – I love unicorns…)
.
Note:

  • I mixed together oat biscuits to the plain digestives to add interest in flavour. It also gives you a different sort of crunch compared to the pap the digestives can become.
  • Resting the pressed biscuit base in the refrigerator while you make the filling firms the butter within.
  • Sour cream tenderizes the cake, as well as enhancing the tang of the cream cheese.
  • Excessively tapping away the air bubbles is the key to avoiding cracks on the surface that is the oh-so-common pitfall of baking a cheesecake.
  • Lining the sides of the pan with baking paper also helps to avoid cracked surface. The common problem with the cheesecake is that it tends to stick to the side of the pan, but as it cools it tries to pull away from the wall. This tension ends up with a cracked surface. Whereas if you line it with baking paper, the paper will agreeably pull away with the cake too…
  • The only down-side about this cake (if there is one) is that you have to keep your mitts off & leave it to mature over-night!

.

So here it is! (Finally!) My baked cheesecake recipe.

.

x . x x . x x . x x . x x . x x . x x . x x . x x . x x . x x . x x . x x .

.

The Baked Cheesecake Recipe:

.
Ingredients:

For the biscuit base:

      70g Oat biscuits

(…Obviously it depends on brands, but for me it was 4 ½ biscuits)

      85g Digestive biscuits

(…Obviously it depends on brands, but for me it was 5 ½ biscuits)

      70g unsalted butter


.

For the filling:

      70g unsalted butter


      90g castor sugar


      330g cream cheese


      90 ml sour cream


      100g whole eggs (approximately 2 eggs)


      100 ml double cream


      25g flour


    12 ml lemon juice

.

x . x x . x x . x x . x x . x x . x x . x x . x x . x x . x x . x x . x x .
.

Method:

  • 1. First begin by greasing a 8″ round spring-form cake pan with butter. Then line both the base & the sides with greaseproof baking paper.
  • 2. Now on to making the biscuit base. First measure your biscuits (70 grams Oat biscuits + 85 grams Digestive) in a food bag.
  • 3. Crush them by hand or bash it with wooden rolling pin. Leave some chunky for interesting texture.
  • 4. Melt 70 grams of butter. Put it in the food bag.
  • 5. Massage the food bag to combine.
  • 6. Empty the mixture in a greased & lined pan.
  • 7. Press the biscuit mixture firmly to the base. I like to do the edges & work to the middle. (Optional: cling-film the three middle fingers for hygiene & to avoid buttery fingers!)
  • 8. Refrigerate the pressed biscuit base while you make the filling.
  • 9. Preheat the oven to 170 degrees centigrade.
  • 10. Next, in a mixing bowl whisk the 70 grams of butter until very soft & creamy.
  • 11. Add in the 90 grams of sugar. Whisk & combine.
  • 12. Add 330 grams of cream cheese. Whisk & combine.
  • 13. Add 90ml of sour cream. Whisk & combine.
  • 14. Add 100 grams of whole eggs. Whisk & combine.
  • 15. Add 100ml double cream. Whisk & combine.
  • 16. Add 25 grams of flour. Whisk & combine.
  • 17. Add 12ml Lemon juice. Whisk & combine.
  • 18. TAP the bowl MULTIPLE times on the work surface to let the air bubble out. (take your time doing this as this is the key to avoiding cracked surface!)
  • 19. Slowly pour the mix in to the cake pan. Tap it some more on the work surface.
  • 20. Place the pan on top of a baking tray, & pop it in the oven. (You need the baking tray to collect the small amount of butter that seeps out from the bottom of the cake pan)
  • 21. Bake for 30 minutes first.
  • 22. Have a look. If it looks like it is starting to brown too much on top, cover loosely with foil.
  • 23. Bake for another 10 minutes.
  • 24. Skewer test. I like it when it isn’t thoroughly cooked. (But obviously not raw!) If there’s a tiny bit of curdle on the skewer still, it’s fine, take it out.
  • 25. Leave aside – still in the cake tin – overnight to mature.

www.cocoandme.com - Coco&Me - Baked Cheese cake biscuit base recipe with making process pictures/ images - with embossed pattern of unicorn & squirrel

April 11th, 2009

Lemon drizzle cake with lemon icing

www.cocoandme.com - lemon drizzle cake with recipe

(For the extra glossy icing, I put the iced cake back in to a pre-heated oven of 230 degrees for just under 1 minute. – By doing this, the moisture evaporates a little & the icing becomes slightly crystalized, & shinier!)

.

.

I’m the type that take cook books to read in bed. I have piles of them by the bedside.
I read through these books like a bible. And when I find recipes that are worth careful reading, I imagine every step in my mind… – I imagine what it must taste like. – And when it’s a “really” good recipe, I close my eyes & start to add or change the recipe here & there, think of how to serve them, & to whom, at what kind of occasion.

.

Imagining about food, (especially with sugary content ^^) is my all-time stress-buster. Must admit, it HAS been known to have the dis-advantage of me hoping out of bed to raid my food cupboard at times (!), but the best thing about this imagination-game is when, sometimes, my trail of thought affects the contents of the dream I am to have that night.

.

Whilst in my dream world, the said recipe gets wilder and wilder, & the story surrounding it most certainly strange, a bit like Alice in Wonderland actually. So far there was a nice guest appearance from Monsieur Hermè, who was slurping fizzy cola from a paper cup with some faces I knew from 15 years ago (that I thought I had forgotten about), critiquing the recipe in question! At a food court in a mall of all places! Lol…
.

The other night I read a recipe book in bed as usual.

.

And I got very much fixated on carrot cakes. I like ’em moist. The cream cheese frosting, a must. No raisins, but lots of walnuts. Easy on the spices.

.

By now, I was hoping to dream more about it in my dream, but my dream story must have had a twist, – because when I woke up the next morning, as odd as it may sound, my fixation was not CARROT cake anymore but LEMON cake instead.

.

When I woke up, I was like: – So that’s it. Here I am totally fixated on lemon cakes. Gotta bake it. Like, now. – But what kind of lemon cake? Should it have lemon juice &/or just zest? Which cake tin? Round? Square? How should it be garnished? Lemon Icing? Drizzled? What’s the best lemon/ sugar ratio for lemon syrup? … Hmm! It’s like trying to solve a good puzzle! I Love it.
.

x . x x . x x . x x . x x . x x . x x . x x . x x . x x . x x . x x . x x .
.

So here it is, my lemon cake recipe after numerous test-bakes & sacrificial loosened belts for the cause.

It is super moist thanks to the drizzle, & the sponge is flavoursome because some of the plain flour has been replaced with almond powder. It also keeps exceedingly well. Please take note, there’s lemony notes everywhere, what with the zest & the juice in the cake batter, the lemony-sugar syrup drizzle, aswell as more juice in the crunchy icing top. There’s the optional candied lemon strips for the garnish too. – IT’S pretty LEMON-MAD (but not in a OTT way).
.

What does sour cream do to the cake?

As well as contributing a fresh & tangy flavour that’s just a perfect addition for a lemon cake, sour cream, being an acidic ingredient, tenderizes the gluten formed in the cake batter, which in effect, results in a finer, dense & moist sponge.
.

Why clarify the butter in the cake recipe?

When you gently melt the butter, the 15% water content evaporates & you are left with three layers, separated by density. The top layer is fine foam of whey proteins that floated up, the middle is clear highly purified liquid, & the bottom is cloudy white residue of more milk solids.

The middle layer is the “clarified butter”. It’s unique points are:

  • It has a higher smoke point. It can be heated to 200 centigrade before burning (for example this is perfect for pan-frying, & for making pale coloured crepes!). This is because we’ve removed the milk solids which burns easily.
  • The highly purified butter gives the cake a concentrated butter flavour. Also slightly nutty fragrance. Typically financiers, madeleines & genoise sponge uses clarified butter.
  • It won’t get rancid as quickly as un-clarified butter, since the water content & the impurities had been removed.
  • The cake becomes moist & tender because the butter relaxes the gluten in the flour.

To make the clarified butter:

First work out how much to melt. You should melt 130%+ of what the recipe calls for. (My lemon cake requires 100g of clarified butter, so I’ll be melting 130g.)

  • 1. Melt butter in a saucepan or microwave.
  • 2. Skim the foam/ froth (whey proteins) that surface with a spoon. The best way to skim efficiently is to use the back of a spoon to gently push the froth to one side of pan & then spoon it out.
  • 3. Leave aside a little to let it settle in the pan.
  • 4. Finally gently spoon out the clarified layer, leaving the milky residue still in the pan.

The star tip here is to have it warmer than body temperature when time comes to use it. The warm liquid will be runnier to mix better with the batter (just like how oil is gloopier when cold, but watery when heated up). Melting & separating the layers is a little extra work to do, but it will make a difference!

.

Another mundane but important tip is that you really will be better off if you weigh out all the ingredients beforehand.

.
x . x x . x x . x x . x x . x x . x x . x x . x x . x x . x x . x x . x x .
.

Lemon Drizzle Cake with Lemon Icing Recipe:

(8″ cake = 7 to 8 slices)

.

Ingredients:

(quantities for 8″ round baking tin or something similar)

200g eggs (about 4 eggs)
240g sugar
a pinch of salt (3g)
135ml sour cream
20ml of lemon juice
190g plain flour
40g almond powder
5g baking powder
100g of clarified unsalted butter (have prepared 130g to skim from)
zest of 1 unwaxed lemon

For the lemon syrup to drizzle:

50ml lemon juice
60g castor sugar

For the lemon icing:

35ml lemon juice
200g icing sugar

For the garnish:

skin of 1 unwaxed lemon
50g sugar
roughly chopped “extra green” pistachio

.

Things to prepare beforehand:

  • Line the bottom of the baking tin with baking paper.
  • Butter the baking tin sides. Then move around some flour in it so that it clings to the sides. Tap out excess flour, & store the prepared tin in the refrigerator until needed.
  • Grate 1 large unwaxed lemon & mix it with a teaspoon of sugar & leave aside ( = the sugar enhances the lemony quality/ essence). Remember, don’t grate the white pith under the yellow skin. It’s too bitter.
  • Melt 130g of unsalted butter. Weigh out 100g of the clarified liquid.
  • Preheat oven to 180 degrees C.

.

x . x x . x x . x x . x x . x x . x x . x x . x x . x x . x x . x x . x x .

.

Method:

.

  • 1. In a large steel mixing bowl, loosely whisk 200g of eggs.
  • 2. Put the mixing bowl above a pot with simmering hot water (bain marie).
  • 3. Whisk the eggs with 220g sugar (added in three go’es) until light cream in colour, & thick in textureIt should be so thick that it dollops off the whisk. You’d be whisking for 5 to 10 minutes. The egg mixture would look like it tripled in quantity.
  • 4. Put together 135ml sour cream + 20ml of lemon juice + lemon zest + 3g salt in a seperate bowl, then whisk it in to the egg foam. The lemon juice loosens the gloopy consistency of sour cream, & makes life a little easier to mix it on to the batter!
  • 5. Sift & then fold in the 190g plain flour + 40g almond powder + 5g baking powder.
  • 6. Warm the prepared 100g clarified butter to just above body temperature. Warm clarified butter is much more fluid than cold. It will merge with the cake batter better.
  • 7. Take a little of the cake batter & mix it in to the butter dish. This technique will ensure that the butter mixes in evenly & quickly.
  • 8. Now fold in the butter + batter mixture to the rest of the batter. Make sure it is thoroughly folded in to the batter from the bottom of your bowl, as butter is heavier than the batter, it sinks to the bottom & you’d have a weird hard layer on the bottom of your cake!
  • 9. Pour the batter in to the prepared cake tin.
  • 10. Pop it in the preheated 180 degree oven for 35 to 40 minutes, or until it passes the skewer test. Use a metal skewer & pierce the middle of the sponge. If it comes out clean & the tip is hot to the touch, then it is done.
  • 11. While the cake is in the oven, make the lemon drizzle syrup. Simply heat 60g castor sugar with 50g lemon juice in a small saucepan until the sugar has dissolved & melted completely. (Beware! The liquid easily boils over if you’re not watchful!)
  • 12. When the cake has baked, quickly de-mold from the tin & place upside down on an oven tray. The bottom will be the top of the cake. This way, you’ll get a level top surface perfect for achieving flat icing.
  • 13. Place the cake-tin wall back around the sponge. This trick will keep the hot lemon syrup from spilling everywhere.
  • 14. Skewer the sponge & spoon the hot syrup over it & let it soak in to the hot sponge.
  • 15. (Optional) While the cake is cooling, make the lemon garnish:
    – Peel the lemon skin. Make sure there’s no bitter white piths attached to the underside.
    – Cut it in to thin short strips.
    – Boil it in hot water for 3 minutes. Then drain.
    – Put it back in a pan with 50g sugar & just enough water to cover it.
    – Boil it for 6 minutes.
    – Leave to cool in the sugar liquid until you need it.
  • 16. Now make the lemon icing:
    – Place 200g icing sugar in a small bowl.
    – Pour in 35ml lemon juice & make the paste.
  • 17. Place (upside down) cake on a level surface. Pour the white icing in the middle, all in one go. Let some (but not all) drip to the sides.
  • 18. While the icing is still wet, garnish the top with the lemon strips &/ or chopped green pistachio.
  • 19. For the extra glossy icing, put the cake back in a pre-heated oven (230 degrees) for under 1 minute. The moisture evaporates & the icing becomes slightly crystalized. This step also changes the mouth-feel of the icing from gooey to somewhat sharper.
  • 20. Wait for the icing to harden. Never try to move the cake while the icing is soft as that will crack the icing surface.
  • 21. Slice with a sharp knife. Wipe knife after every slice for the clean cut.

Coco&Me : Lemon Drizzle Cake with Lemon Icing Recipe : www.cocoandme.com

« Previous Entries