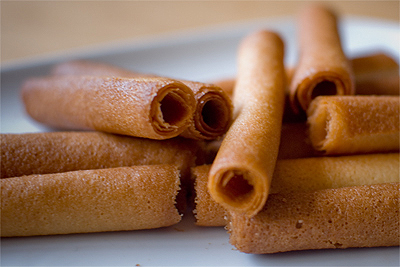
Crepes dentelles (aka gavottes & paillets feuilletines)
.
Recently I needed some ‘paillets feuilletines’ for the French dessert I was making. I don’t know about where you live, but here in London, it is not easy to get them off-the-shelf. It is definately not mainstream, & instead it is a specialist baking ingredient. Ofcourse, I could get them online, but they sell them in large packs (all I needed was a tiny amount to cover the side of a cake as decoration), & besides, you’ve got to wait several days to get it delivered! Let alone forking out the shipping fee! (I’m a stingy kind of a gal.)
.
Upon research, I realized that crushing up ‘crepes dentelles’ (another name for these is the brand-name called ‘Gavottes’) is a great substitute, or if not the same as the ‘paillets feuilletine’ itself. You won’t believe how happy this realization made me! Because it means that I could make them at home whenever needed, moreover, it’ll be fresher & crunchier! (And quite probably superior than store-bought because it won’t have any substances you won’t normally include in a home-baking situation).
.
- Def: Crepes dentelle is a wonderfully delicate & flaky cookie that is often folded in to a cigar shape. Buttery in flavour, it is made from thin crispy crêpe that is rolled as soon as it is out of the oven. It originates from Quimper, a charming little town with an almost village-like atmosphere, in the cultural heart of Brittany, France. Crepes dentelles are a delight to eat on it’s own or pairing it with cream-based desserts.
- Def: Paillets Feuilletine is a baking ingredient that is often used as a component in French desserts for it’s crunchy texture. It is used for Praline Feuillete for example, where feuilletines are stirred in to chocolate & praline paste (… think posh version of ‘chocolate cornflake cake’). Pâtissiers will then spread this thinly in a layered cake to add crunch to a moussey cake. Chocolatiers might enrobe feuilletines mixed ganache to make crunchy bonbons.
.
So here below is my own recipe for Crepes Dentelles slash home-made Paillets Feuilletines. As with all my recipes, I have left no stone unturned & has lots of notes alongside. It uses basic ingredients, but has a fair amount of variables to consider. And if you are making the cigar shape, you’re most definitely throwing in some burnt fingers in to the bargain too. Discouraging? Sorry, but yeah, I thought it wise to warn you prior…
.
x – x – x – x – x – x – x – x – x – x – x – x – x – x – x – x – x – x
.
Crepes Dentelles/ Paillets Feuilletines Recipe:
(Yields 18 Crepes Dentelles using a 9cm x 16cm template)
.
Ingredients:
- 60g melted butter
- 110g sugar
- 1 egg white
- 60g flour
- about 35 to 40ml of water
.
Equipments you’ll need:
- A stencil template (please read below the method for how to make)
- Metal spatula
- Two or more sheets of Silpat
.
Method:
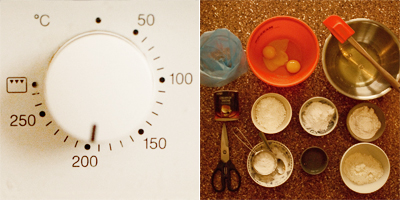
- 1. Preheat the oven to 210 degrees.
- 2. Melt 60g of butter completely in a mixing bowl.
- 3. Put 110g of sugar in the hot melted butter. Stir until the sugar has dissolved & is not grainy.
- 4. Whisk in 1 egg white.
- 5. Sift in 60g of flour.
- 6. Use a whisk to mix in to paste.
- 7. Pour in half of the water & mix well. Then pour in the rest gradually to the correct consistency.
- (Note that here, the final consistency of the batter is very thin & runny like single cream. – This consistency is THE KEY to how smooth your Crepes Dentelles’ surfaces will turn out to be. If too thick, the surface will be rough with air bubbles. If too thin & runny, you will be having trouble containing it within the stenciled shape. I have given you the rough indication of 35 to 40ml of water, but the correct consistency for your batter has to be gaged by your senses, as it is variable.)
- 8. Spatula all of the batter in to a piping bag.
- (It makes the following work much more methodical & a lot less messier.)
- 9. Lay the stencil template on the silpat. Hold down to keep it flat & in place. Spread on the batter evenly with the spatula.
- (There are three things to consider here:
A:Â Domestic ovens tends to brown goods unevenly. For example, my oven browns faster from the edges, which makes it difficult to evenly brown my sheet of Crepes Dentelles. So, for ‘even’ browning, the placements of the batter on the silpat has to be considered. The middle of the tray (away from the edges) is best.
B: Also, please resist the urge to spread too many shapes on one tray. When the time comes to rolling them in to Crepes Dentelle shapes, there is only about 15 seconds to do so before it’s too rigid. About two spreads per tray would be ideal I think.
C: Spread thin. Please read about this in the notes below under the title ‘Stencil’.) - (Please use the stencil even if you are making Paillets Feuilletine, as it’s easier to spread batter thinly & evenly.)
- 10. Place the silpat on the baking tray.
- 11. Insert this in to the middle-shelf of the pre-heated oven & bake.
- 12. In the meantime, while you wait for it to be baked, spread the next batch on another silpat. You can pop it in when the first comes out.
- 13. The baking could take anything between 2 to 4 minutes. Best to check wether it is done from 2 minutes onwards. You might also want to turn your baking tray around to brown it evenly.
- (It is done when there are no white areas. But be careful not to over-bake – it could be that extra 10 seconds more that makes your Crepes Dentelles/ Paillets Feuilletines taste burnt. Use your first batch as an indicator to get familiar with the correct shade of brown.)
- 14. If making Paillets Feuilletine, take the baked sheets off the silpat to cool, then crush with your fingers. If making Crepes Dentelles, immediate start rolling it in to shape. – To roll in to round cigar spirals, use a straw or any thin cylindrical rod.
- (The crepe is only pliable for the window of 15 to 25 seconds.)
- (I prefer to turn the sheet back to front, & roll the surface that was facing the silpat on the inside. This is because the silpat side is glossy from being baked on the glass-fiber within the silpat. Furthermore, detaching the sheet off the silpat first makes the rolling process easier.)
- 15. Continue baking by swapping turns between the two silpats. Just remember to clean off any excess bits on the silpat by wiping with kitchen paper or by scraping with a different spatula.
.
.
x – x – x – x – x – x – x – x – x – x – x – x – x – x – x – x – x – x
.
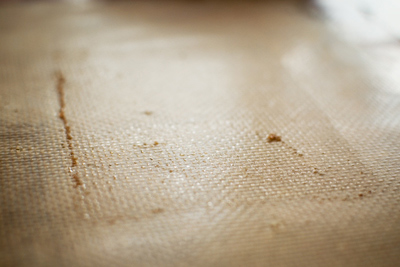
(From second batch onwards, remember to clean off any bits on the silpat by wiping with kitchen paper or by scraping with a different spatula.)
.
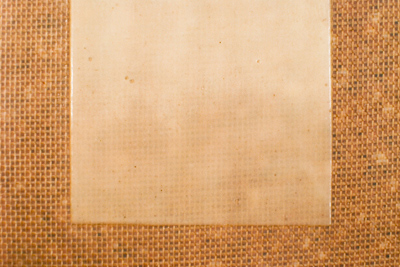
(Spread the batter thin. You can almost see through to the mesh of the silpat!)
.
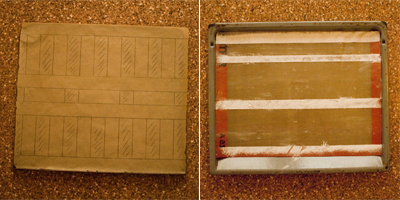
Stencil:
- – Finding the material: To make the stencil template, first find a plastic sheet that has the desired thickness. The thickness, or should I say ‘thinness’ is vital to get right. If your crepes are too thick, it’ll be chewy. But if it is too thin, it will be too fragile & break apart as you roll. For my crepes, I used a 240 micron (2.4mm) acetate sheet that I purchased from CassArts. Sometimes, there might be something similar around the house that could turn in to a good stencil. The stiff plastic folder sleeves for filing could be a contender. Or maybe you have a see-through plastic gift box that is stiff enough? If push comes to shove, perhaps you can even cut out the side of your cereal box…
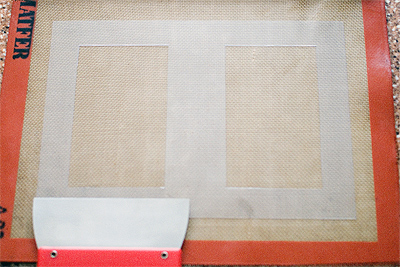
- – Cutting to size: I like to cut mine with lots of ample frame all around so that the batter does not land on the silpat. It keeps the silpat clean & crumb-free for the next batch. The measurement of the rectangle is up to you. FYI, mine is 9cm x 16cm.
.
(My spatula is wider than the cutout area.)
.


