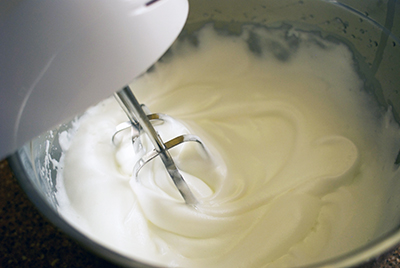
September 14th, 2015

How to whip egg whites & obtain high volume with stability

Coco&Me - How to whip egg whites ~ How to obtain high volume foams with foam stability ~ www.cocoandme.com ~ Coco And Me

.

Getting the most out of your ingredients is, I think, one of the most delightful things to do as a baker or a cook. It brings out the best results (in our case, a fine & moist sponge that has high volume!) & because you know how to best approach the ingredients, you can progress with the baking in a relaxed, untroubled manner.
– I also think we can get a lot more out of the ingredients when we treat it with respect & use it to its full potential. By proceeding with respect & gratitude to our foodstuff for being available to us, the sense of pleasure from cooking with it & then eating it is tenfold.
.
In terms of baking, whipping the egg whites is an essential technique.
.
There are actually 3 distinct methods to whip ~ French, Swiss, & Italian way. Each are suited for different desserts. For example, the French meringue method is often used for sponge baking. The Swiss & the Italian method on the other hand are often used in cold mousses & cremes because the heat-process kills off bacteria, & makes it safer to incorporate.
.
The French meringue technique is by far the most widely used in home baking, so for this post I would like to focus on that & tell you everything I know to make foam that is fine & stable.
.
Fine foam = results in fine structured sponge (as opposed to course textured) that has a tender mouthfeel.
Stable foam = will not deflate so readily. Particularly vital for retaining the volume of the foam when folding in to the batter. It will also give you a bigger & fluffier sponge.
.
So, below, I have written the ‘how-to’ in steps (in bold letters) with the reasoning behind each (in regular letters). It gets a bit too science-y, but hopefully I have managed to get it across well enough! Happy reading~! xx
.
x . . x . . x . . x . . x . . x . . x . . x . . x . . x . . x . . x . . x . . x . . x
.
Coco&Me’s How Best To Whip Egg Whites
.
1. 
Start with eggs straight from the fridge.
.
I know some say use room temperature, & some say no, use refrigerated. ~ So here is the logic to both:
.
The room temperature egg white is indeed easier to whip. It will trap the air easier because the surface tension is weaker. (= surface tension is the elastic tendency of liquids which makes them acquire the least surface area possible). But the downside is that the foam is less stable/ easier to deflate because it is not as viscous/ thick.
.
Whereas, for the cold whites, although it takes longer to whip (because it is thicker), the foam will come out stable. You will be able to create a much finer foam too, as, when you whip the stable foam, you are successfully splitting it to smaller multiples without it deflating.
.
= Using cold refrigerated egg whites wins the competition.
.
Some patissiers even go as far as putting the egg whites in the freezer until it is 1~4 degrees centigrade so that they have the added effect of having a head-start.
.
2. 
Separate the egg whites in to a dry clean bowl that is not plastic. - Make sure you don’t have any broken yolk residue. 
.
The reason for both has to do with lipids (another word for ‘fats’.) The fats contained in the yolk & any trace amount of oil on the surface of your mixing bowl has the negative effect on the foaming properties. 
.
To explain why, I first need to tell you about what happens when you whisk:
.
When you whisk the egg whites ~ which is made of about 90% water &10% protein ~ the tangly globular balls of protein uncurls. This is a process called denaturation, & as it uncurls, it exposes it’s long strands of amino acids. These amino acids has two distinct ends; the water-loving ‘hydrophilic’ & the water-repelling ‘hydrophobic’.
.
As the 10% protein uncurls in the 90% water, it aligns itself inbetween the water & the air, because of the hydrophilic/ hydrophobic nature. – Meaning, it immerses the hydrophilic end to the water, & sticks the hydrophobic end to the air.
.
Upon whisking air in to the egg whites, all the while, the uncurled strands get busy to attach to it & consequently traps the whisked in air within its new tangle. This tangle is now a network which crosslinks & holds its shape, stabilising the foam.
.
It’s a little difficult to grasp in words, so have a look at my diagram below:
Coco&Me - How to whip egg whites ~ How to obtain high volume foams with foam stability ~ www.cocoandme.com ~ Coco And Me ~ the perfect meringue
.
Getting back to why lipids (such as fats from yolk & the grease from the bowl) inhibits the foaming properties is because it interferes with the protein that want to make a stable network. Namely, the air bubble & the lipids are in competition for the water-repelling hydrophobic protein.  
.
As for why plastic bowls are not a good idea to use is because plastic is a porous material, & sometimes it can have residues of fats from the last use, even if you think you have washed it well.
.
3.
Firstly, on the lowest speed, loosen it up. 
The egg whites has two parts ~ the thick viscous portion that used to surround the yolk & then the other part which is watery. It is best to first whisk those two parts together to blend it. This is because the watery part gets foamy quicker as it has less surface tension (same explanation as in step 1). When the two parts are blended, they foam at equal speed.
.
Coco&Me - How to whip egg whites ~ How to obtain high volume foams with foam stability ~ www.cocoandme.com ~ Coco And Me ~ the perfect meringue
(First on lowest speed!)
.
4.
When most of the liquid has turned fluffy white, & the foam starts to cling to your whisk, put in the first 1/3 of the sugar. Then turn the speed to high. 
.
Coco&Me - How to whip egg whites ~ How to obtain high volume foams with foam stability ~ www.cocoandme.com ~ Coco And Me ~ the perfect meringue
(Ready for the first sugar to be poured in!)
.
The timing at which you add sugar is very important. If too early, the foam will not stabilise & will be syrupy. And if too late, the water within will leak. To figure the timing for sugar, it’s best to understand the role of sugar in egg whites.
.
Sugar is hygroscopic (= it attracts & holds water molecules from the surrounding environment).
.
When you add sugar, the water content of the egg whites is withheld. The water becomes viscous/ thick & elastic. This thickened water has a stabling effect on the protein structure & holds the air bubbles in place.
.
This viscous water greatly helps when the cake is in the oven, as, the water is so thick, it is difficult for it to readily escape as vapour. As a result, it holds the air bubbles in place while the cake structure is stiffening its shape around it.
.
Which is all great news, but on the other hand, it is important to know that sugar has a negative effect on the foaming properties & results in reduced volume. If the water is too viscous, it is difficult to form the bubbles inside.
.
This is why sugar has to be introduced in stages, with the right timing. The egg white has to be foamed enough to accept the inclusion.
.
5.
The timing for the next sugar is when the volume has massed, & the foam is starting to get evenly fine. Put in half of the rest of sugar. The speed of the hand mixer should remain on high.
At this point, think about how your whisk is mixing it. The ideal way is for the whisk to incorporate as much air, right? So, if the whole whisk-head is submerged completely in the whites, it’s not catching in any air.
– Also, rotate your bowl so that you are whisking from every angle, & from every nook so that it foams uniformly.
.
Coco&Me - How to whip egg whites ~ How to obtain high volume foams with foam stability ~ www.cocoandme.com ~ Coco And Me ~ the perfect meringue
(The foam’s evenly fine! Next sugar please~! Whizzing on high.)
.
6.
When you feel the foam is getting heavier & you can see stroke patterns, put in the rest of the sugar. – Nearer the end, when you think it has reached maximum volume, lower the hand mixer speed to low.

.

Coco&Me - How to whip egg whites ~ How to obtain high volume foams with foam stability ~ www.cocoandme.com ~ Coco And Me ~ the perfect meringue

(Soon as you can make strokes in the whites, put the last lot of sugar in.)

.
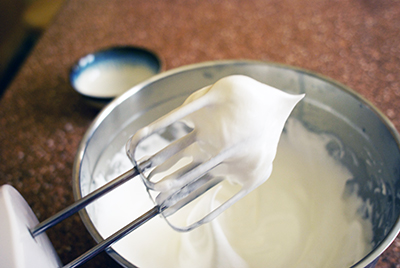
Coco&Me - How to whip egg whites ~ How to obtain high volume foams with foam stability ~ www.cocoandme.com ~ Coco And Me ~ the perfect meringue
(Done? Wait… there’s one last step…)
.
7. 
As a last step, whiz your mixer around the outskirt edges & tighten the foam to make sure that the foam is of equal fine-ness all over. 
In culinary terms this is called ‘serrer’. Foam on the outskirts tend to be less whisked. Because of that it tends to have a larger air bubble. In baking, it is best to have uniformly sized foam, as the larger air bubble will absorb the nearest smaller ones & become bigger (=’Coalescence’), giving you an unevenly textured sponge. 
.
Coco&Me - How to whip egg whites ~ How to obtain high volume foams with foam stability ~ www.cocoandme.com ~ Coco And Me ~ the perfect meringue
(Don’t forget the edges~! Above picture is an example of how the edges have bigger bubbles, so make sure you whisk these big bubbles too!)
.
x . . x . . x . . x . . x . . x . . x . . x . . x . . x . . x . . x . . x . . x . . x
.
Note A:
The ratio of whites to sugar:
When the amount of sugar is more than half of the whites, it is recommended to add sugar in 5 stages, not 3. This is because you’ll want to give each sugar inclusion a chance to melt before the next. – On the other hand, if the amount of sugar is less than 1/3 of the whites, the foam will be unstable & would not keep shape so well. The bubble will collapse too soon as it bakes & the sponge will come out too dense. I often hear of ladies with health conscience cutting back on sugar in the recipe, but I don’t recommend messing with it. But then again, so long as they don’t blame the recipe itself, it’s their cup-of-tea in the end I suppose…, right?
.
Note B:
About adding a pinch of Cream of Tartar & lemon juice or vinegar:
It’s all about the science-y pH balance…
.
The pH is measured between 0 to 14. 0 being ultimate acidic, 14 being ultimate alkaline. Lucky number pH 7 sits in the middle at neutral.
.
Our egg whites in question is sitting around pH 8 to 10 (Actually, more precisely speaking, fresh egg is pH 8, & older egg is at pH 10 as the acidity escapes from the pores of the egg shell during storage). Meaning, it is slightly on the alkaline side of the scale.
.
Lemon juice & vinegar is very acidic. They sit on a pH 2. Cream of tartar is at pH 4. Each number on the scale is 10 times more either way each time, so you can just imagine how super acidic these are.
.
In terms of whipping egg whites for baking, the protein strands (as explained in Step 1) react better when it is near pH 4 to 6. From this you can understand that when you add lemon juice/ vinegar/ cream of tartar,  you are readjusting the pH so that your egg proteins have a better chance. Note of warning though – too much added will have an inhibiting effect on foaming.
.
When I bake, I personally don’t bother with lemon juice/ vinegar/ cream of tartar. I like preciseness, so when a recipe calls for a ‘pinch’, it is too vague for me. But, if you are to use any of these ingredients, I would suggest that cream of tartar is probably the best option of the lot, as it is the least acidic at pH 4.
.
Note C:
Should sugar be added in the middle or the side of the bowl?
Quite some years ago, I came across somebody’s food blog, boasting about how adding from the side of the bowl was her idea, & how the method caught on. “…as dumping sugar in the centre would deflate the foamy whites.” Firstly I should point out, that that is wrong. Please pour in the sugar in a slow steady stream in the centre. If whipped correctly at each stage, the weight of a bit of sugar will not deflate any foam. The major problem when adding from the side of bowl is, it is a lot more difficult to get your whisk to, & because of that, you might have granular bits that hasn’t been incorporated sitting on the side, which would make your whites syrupy.
.
x . . x . . x . . x . . x . . x . . x . . x . . x . . x . . x . . x . . x . . x . . x
.
Lastly, my personal take:
.
Here is what I believe makes a baker create the best foam. And that is… ‘Imagination’. ‘Observation’. ‘Taking pleasure’. ‘Repetition’. 
.
In this particular case with whipping the finest foam, imagine how the actual air can be best incorporated.
.
For example:
After reading my guide above, you now know that sugar makes the foam stable, but at the same time, if too much too soon, it inhibits it, right? So observe the foam you’re whipping, & imagine the bubbles forming. Do you think your protein network is tangling well? Imagine the new air bubbles created – popPOPpop! Oh you need more sugar? OKAY! Let’s pour more sugar in! Let’s trap the next batch of air!
.
When the whisking is done, feel the pleasure in how the bowl has gotten heavy with so much air inside. You’d be really amazed with the difference in weight. Take pleasure in the confirming moment that ‘air’ is actually ‘heavy’. Smile at how well you’ve managed this task!
.
Every week, I whisk about 25 egg whites in one go for the 6 flourless chocolate cakes for my cake stall. I make this in a huge huge bowl. When I succeed with whisking the best foam, I notice that my cakes are taller, & it looks good. I also get a bigger yield from it which could mean a sale or no sale for me! ^^
.
Ofcourse, like anybody, my skills were not good in the beginning, but over the years, I’ve gotten better. Good enough to now be able to write this ‘how to’ article. With baking, practising, practising, practising is the only way to success. Like learning a piano perhaps or riding a bike, you’ve got to practise it repetitively to get better. You can’t expect it to be amazingly perfect the first time round. No one is a superman or a superwoman!
.
x . . x . . x . . x . . x . . x . . x . . x . . x . . x . . x . . x . . x . . x . . x

February 4th, 2007

About Butter

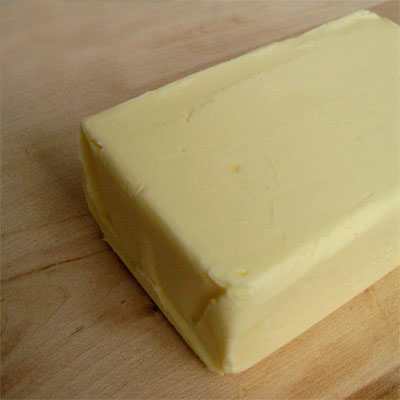
Butter

.

So far in previous posts I have written facts & tips on how to use the essential baking ingredients: flour, eggs & sugar. This week is about Butter. Just like the others, knowing how best to work with butter is vital for successful happy baking!
.
What is butter?
Butter is essentially the concentrated fat of the milk with some water. It is made from milk, cream or both of these ingredients. Commercial butter may even be made from whey which is taken during the cheese making process. The colour of the butter varies from dark yellow to creamy white – this is due to what the animal’s are fed on, or is sometimes manipulated with food colourings. The basics of butter making is simple – they produce it by churning the milk/ cream until the fats separate from the liquid (buttermilk).
.
What is the best way to store butter?

  • Storage of unsalted butter: up to 2 weeks refrigerated & up to 5 months frozen from day of purchase.
  • Storage of salted butter: Salt gives better shelf life; up to 2 months refrigerated & up to 6-9 months frozen from day of purchase.

Make sure it is properly sealed in its foil packaging to avoid it turning rancid from exposure to air, & away from smelly foods as it readily picks up odour. The best way to defrost is to place the required amount in the fridge for 6 hours – never leave it in room temperature as it’ll end up with water droplets sweating out of it.
.
How soft is room temperature butter? How do I achieve it?
You can tell wether you’ve achieved ‘Room temperature butter’ when the softness allows you to ‘easily’ depress the surface with your finger, at the same time not melting.
To obtain it, all you have to do is to leave the quantity of butter your recipe requires (still in its packaging) out in the room for 30 minutes. – I never have the time nor patience to do that (or indeed remember to take it out in advance), so I just cube my block of butter straight from the fridge & zap it in the microwave at 10 second intervals at first & then careful 5 second gaps until the right consistency is reached. Easy peasy.
.
How do I cream butter? And Why?
To cream butter, first start off with cubed butter that has been softened to room temperature. Place in a deep mixing bowl (so that it doesn’t spit everywhere) & using the mixer, beat it till it is ‘creamy’, soft, smooth & light from incorporating the air. Use immediately.
Typically, many sponge recipes require you to whip the butter to a cream texture before you add the sugar. Once sugar is added to correctly creamed butter, it has incorporated the air in to it which would then cause a foaming action in sponge cakes. (when the cake batter is in the oven, the incorporated air is like a bubble, trapped, & it eventually ‘sets’, leaving tiny holes in your soft sponge).
.
Why do baking recipes call for ”unsalted’ butter’?
Salted butter is tasty for spreading on your morning toast, & its shelf-life is a lot longer than unsalted. But for baking, the taste of salt gets in the way, & besides, salted butter browns faster. So even if a baking recipe such as madelaines, pies, and buttercakes call for salt, you’d use unsalted butter and then sprinkle in the salt separately to control its saltness.

.

How do I make home-made butter?
Please follow this link for an online recipe I found.

.

Health facts:
One tablespoon of butter (14 grams) contains 100 calories, of which 7 grams are saturated fat, and 30 milligrams of cholesterol. In other words, butter consists mostly of saturated fat and is a significant source of dietary cholesterol. For these reasons, butter has been generally considered to be a contributor to health problems, especially heart disease.

Also, people with milk allergy need to watch out.

.

Can I substitute butter with margarine?
In principle yes – they are both fats. But if you are doing it for health-conscious reasons, you’d have to be aware that there are loop-holes. Some margarine contain trans fats (the main dietary culprit in raising blood cholesterol) so please read the back carefully. The water content is slightly different between the two, & because of this, the careful balance of the recipe will be mucked about & the result will not be perfect. Also the melt point is different (butter melts at body temperature, while margarine melts at higher than 98.6 degrees) which can only get you further away from what the recipe had originally been planned to do.
I personally never will substitute my butter. Margarine lacks flavour & is greasy on the palate. Butter is a natural ingredient, & is in these baking recipes for a purpose, for such examples as giving a rich buttery flavour & to enhance the other ingredients.

.

x x x x x x x x x x x x x x x x x x x x x x
This week:

After last Saturday’s successful return to the market after my 1 month break, I’ve cranked up my energy & work-volume to Max & am buzier than ever with making n’ baking!
January 22nd, 2007

About sugar (with vanilla sugar recipe)

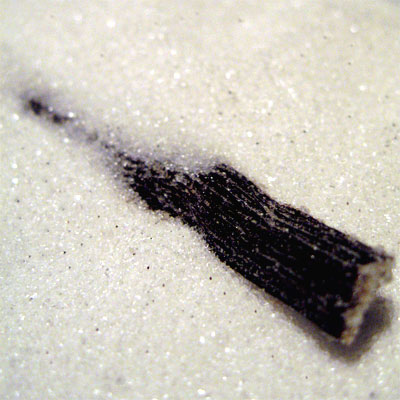
Home made vanilla sugar with vanilla pod

(Home made vanilla sugar)

.
Sugar is a staple in everyones kitchen, & is used extensively in confectionery. Obviously it is sweet, but it’s more than that – it provides moisture, tenderness, enhances other flavours, provides stability in meringues, can caramelize, can even be bitter & increases shelf-life (A good example is jam. High percentage of sugar prolongs shelf life as it inhibits the bacteria to grow). But did you know that there are dozens of varieties of it available? It’s a minefield. It can be mystifyingly confusing… Before my obsession with baking I don’t think I ever used anything other than white refined granulated sugar!
.

So here is a list of some of the sugars. I think it’ll help understand why your recipe is calling for a particular type, & have confidence in switching it when you want to have a more caramelly flavour for example:

  • Granulated ::::: Very versatile, all-purpose sugar but one-dimensional in flavour. No aroma, so it’s great when you just want to have the ‘sweetness’ & pronounce the flavour of the other ingredients such as chocolate in a chocolate cake. – If a recipe doesn’t specify which sugar type to use, it’ll be safe to use granulated.
  • Castor ::::: Selectively sieved from the granulated sugar. It’s known as caster sugar because it is suitable for placing in a ‘caster’, a perforated jar or a bottle, similar to a flour dredger.
  • Icing ::::: It rapidly dissolves even in cold water. A must when you make meringue for macaron. Also great for dusting it on top of your finished product. It is made by grinding sugar to a very fine powder. A small amount of anti-caking agent (for example 3% cornstarch) is often already added to it to prevent clumping.
  • Preserving sugar ::::: Often used for jam making, it has the largest crystals that dissolves slowly which makes it less likely to burn the sugar as it does not settle in the bottom of the pan. It also reduces the need for stirring. Less froth is also produced resulting in a clearer preserve.
  • ‘Golden’ caster or granulated sugars ::::: Molasses is ‘painted’ to the white sugars to add the light golden colour & aroma. Slightly more flavourful than the white.
  • Demerara::::: Free-flowing crunchy crystals. Also good for sweetening beverages such as coffee.
  • Light/ Dark Brown ::::: Based on caster sugar. The molasses is ‘painted’ to give it colour & give depthy, fudgy flavour. (In some cases ‘food colour’ is painted on instead of molasses, to recreate the delicious brown look.) It’s moist, & it gives extra tenderness to the cake. Make sure to not let it dry out & it’ll be hard like a rock.

All of the above can be substituted with each other in principal. They come from the same stage of sugar process, & some are just that they are various crystal sizes depending on what you’d like to use it for.

The confusing part is… some of these can come as refined (bleached, refined white sugar which is pure sucrose/ carbohydrate), partly refined, or unrefined (typically 50% less processed than refined. It retains some of the natural properties, making it wholesome & healthy). It could be under naming such as ‘natural’ or some brands call theirs differently. You really have to study the package before purchase.

  • Light/ dark Muscovado::::: Unrefined natural sugar. Strong tasting natural molasses flavour. Brown & sticky. More unprocessed than Turbinado Sugar.
  • Turbinado::::: Unrefined. Similar in appearance to brown sugar with molasses flavour but paler & course granulation. Often used in tea. This sugar can’t always be substituted in recipes. Its moisture content varies considerably which can affect a recipe. You’d have to carefully adjust other ingredients such as the liquids.
  • Unrefined Soft Light/ Dark Brown::::: Distinctive caramel taste. Light & dark soft brown sugars can be replaced with one another only in small quantities. If you do, the cake will not turn out like you wanted it to, because the flavour & moistness is different between the two.
  • Molasses ::::: Dark syrup extracted during sugar manufacturing. Only a little is needed as it is very concentrated. Not as sweet as sugar. Replace no more than half the sugar called for in a recipe with molasses.

The following are the natural sweeteners:

  • Honey ::::: Distinctive flavour that varies depending on which flower nector the bees have been gathering. Generally, honey can be used in place of granulated sugar, it’ll make the cakes moist & dense. But watch out, it is 25 – 50% sweeter than sugar & tend to brown faster. So experiment with using less of it, it is said that you should use the amount of honey that is equivalent to ½ the amount of specified sugar, reduce liquid ingredients by ½, & reduce the oven temperature by 25 ¼ F.
  • Maple syrup ::::: Could be made from the maple tree sap, or artificially made with maple flavouring. Look for the word ‘pure’ when choosing. It has fewer calories & higher concentration of minerals than honey. Keep refrigerated and consume within 6 to 8 months.

And then for sweetening the chocolate ganache:

  • Invert sugar & Glucose Syrup ::::: It is highly effective in preventing crystallization, & so makes the mixture smoother with better viscosity. It is not as distinctively sweet or flavourful like the other sugars which is great when you rather want to pronouce the flavour of the chocolate itself. But inverted sugar is almost impossible to get if you are a home-user (it only comes in big multi-kilogram tubs) so try honey as a substitute.
  • Trimoline ::::: It is produced from beets. It emulsifies the fat, & prevents recystallization of sugars. It smoothes the texture & increases shelf life by retaining moisture. It has a sweetening power of 128%.

.

History:
Sweet tasting liquid from the Sugar cane (a tropical grass) was first discovered on the islands of the Pacific Ocean some 20,00 years ago (!) but the process of making sugar by evaporating its juice developed in India around 500 BC. It is from then on that the technology for sugar production slowly spread around the world, although for many hundreds of years, sugar was a highly prized and expensive ‘spice’ that was used only in the homes of nobility and royalty, just like the history of chocolate.
.
I recently came across the most insightful historic literature of how sugar was refined & then manufactured into loaf sugar back in 1876 London (loaf sugar was refined white sugar moulded into cone-shaped loaves – which then got cut up either by the retailer or at home using a cleaver & then pounded to powder). I love the way it’s written. Its not just an account of what it was like, but more like a good novel. It describes one of the workers as a creature with chest all grizzly-haired, calls it the ‘Sugar Ogre’ in waiting for juvenile delinquents. – It’s a bit long, but persist. I found that it was worth reading.
.
x x x x x x x x x x x x x x x x x x x x x x x x x x x
.

Home-made Vanilla Sugar Recipe:
Vanilla sugar is simply castor sugar with vanilla. There are no set rules of how to make it. If you want, you can change the ratio of sugar/ vanilla according to wether you’d like the aroma to be intense or subtle. And you can keep replenishing more sugar in to the same jar & the pod would sufficiently flavour the sugar.

.
Ingredients:
200g Granulated or castor sugar (any amount is okay – it just lessens or increases the aroma of vanilla, thats all)
1 x Fresh or used vanilla pod (There are two ways to go about it. To use pod skin & seeds, or just pod skin after you’ve used the seeds for other baking requirements)
Container with tightly fitting lid (I find it is pretty when white sugar has dark specks of pure vanilla seeds, so I recommend a clear glass jar!)

.
1. Chop the vanilla pod – for example, in half. If you’re using fresh pods, de-seed & then chop.
2. Place both sugar & vanilla pod (& seeds) in the jar & mix well, distributing the vanilla beans in the sugar.
3. Tightly seal with lid & store in a cool place. The sugar would be gorgeously scented in 1 to 2 weeks. It will keep indefinately without refrigeration.

.
Uses:
Use the vanilla sugar in baked goods & desserts that calls for both sugar & vanilla. Or sprinkle over home-made sponge cakes, biscuits, fresh fruit, custards, crème brûlée, crumbles, favourite breakfast cereal, hot coffee, milkshakes, yoghurt, buttered toast etc.

.
x x x x x x x x x x x x x x x x x x x x x x x x x x x
.
This week:
I have been busy in the evenings making Chocolate Valentines Hearts for the oh-so-busy Valentine season that’s creeping it’s way.
And my son has started nursery on Wednesday! A milestone. A bit of a tear jerker. It’s 1pm til 3.30pm, Monday to Friday. You’d think that it’ll give me more me-time, but it takes me 30 minutes to walk there, so by the time I walk him & go back home, it’ll only give me 1½ hours at home before I go & pick him up…!

December 11th, 2006

On the subject of flour

Please Note:

I AM NOT AT THE MARKET NEXT SATURDAY 16TH. HOLIDAYING IN HAMBURG. I WILL BE BACK WITH MANY MANY CHOCOLATES N’ CAKES ON SATURDAY 23RD!

.

This week’s entry is about flour.

Flour is the pillar of cakes & also the thickener of creams such as Crème Pâtissière. The most common flour you’d see at the supermarket is made from wheat. But flour can also be made from maize/ corn, barley, rye, rice, chestnut, chickpea, buckwheat. For pastry baking, the wheat kind is mostly used. – Never substitute the type of flour & expect the same recipe to work, as different flour types produce different amount of gluten.
.

Without sounding atall scientific (which I’m not so clued up on anyway), I must write about the importance of gluten. It is responsible of the quality of your cake’s turnout.

– The protein in the flour turns in to gluten when you add the ‘liquids’. During oven baking, the whisked egg whites would rise the cake, & the gluten from the flour would become the pillar to keep the cake in that risen shape. The correct amount of oven-heat would make this pillar solid & the cake will not deflate when it comes out.
– One in every 1000 to 1500 people (in UK) have gluten intolerance known as coeliac/ celiac disease. It is an auto-immune disease, when the body produces antibodies that attack its own tissues. Symptoms can be mild to severe, usually bloating, nausea, hair loss, depression, bowel problems, & even infertility. – Since I have started this stall I have come across so many customers looking for gluten-free cakes. The only gluten-free cake is the ‘Moist Flourless Chocolate Cake’ made with just chocolate, eggs, sugar & orange liquer. And even that, I make sure I point out to them that I cook with flour in the same kitchen & that there may be traces of flour in it. Just like what a packet might say about nuts! The thought of people getting ill over my stuff is ruinous…

.

Do: always sift the flour – even if the packet says ready-sifted. It not only removes clogged up balls of flour (which will remain as flour balls in your baked cakes), importantly, it introduces ‘air’ in to the flour. It’ll be quicker to mix in the flour & successfully too. Some recipes might ask you to sift twice.
.

Do: always measure flour after sifting.
.
Do: store flour on a cool, dry, shelf in its bag or in an airtight container. Apparently, damp & warm conditions would invite little insects called ‘confused flour beetles’ & ‘red beetles’ to hatch in it. (As one of my Kid’s friend says, that’s just ‘yucky yuck’). So, never mix new flour with old. White flour generally keep well for 6 to 9 months.

.

Do: mix the flour using the ‘folding’ technique; rotate the bowl with your left hand, dig your spatula to the bottom & lift it up in big movements, like you are cutting the mixture from the bottom. Keep rotating & cutting & stop when the white flour dissapears.

.

Don’t: over-mix your cake dough – unless the recipe tells you to. Over-mixing would stregthen the gluten structure. You’d end up with a tough & dense sponge where the gluten had squashed the bubbles.

.

Last Saturday:

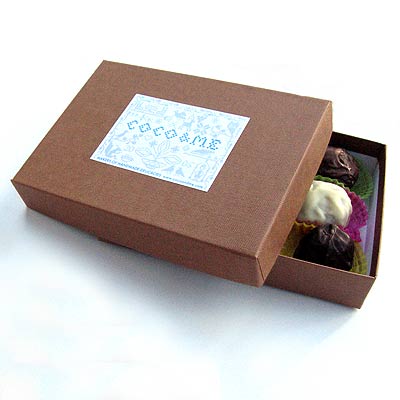
… was a struggle. Every stall holder I’ve talked to was complaining about how there hadn’t been many spending customers. We realized that maybe it’s because it’s a run up to Christmas & people are holding on to their purse until the party season kick starts (hopefully from next Saturday please!). – Although the chocolate truffles (currently doing five types) goes down really well nowadays, & it got sold out quite quickly. I think it is because of the chocolate boxes I started using (pictured below), which costs £1.10 per box. It has a faux canvas texture, & the box is rigid. It’s a type of box you might want to keep, & it goes well with the ‘chocolate = luxury’ theory. – Before these boxes, I have been using self-assembly flat pack boxes made out of white glossy card which cost around 42 pence per box. Huge difference in cost I know, but the difference in quality is so crystal clear, I’ll never go back to those flimsy cheapo flat packs. I’m so happy I found these boxes, it makes me want to roll more truffles…!

.
chocolate_box.jpg

December 3rd, 2006

About eggs

eggs.jpg

.
Last Saturday:
I have been slightly unwell all week & tired, so I made considerably less. No Tarte Tatins, Chocolate Tarts & no Gateaux Basques, & generally less quantities of everything. Actually I was thinking of not trading atall. But the customers would not trust me if I was unreliable. Next time they need a cake or some chocolates, they would not bother checking my stall out & buy elsewhere, right?
– Making less turned out to be a good decision anyway, as formidable amount of rain bucketed down until lunch time, & business was slow.
.
This week’s entry is about eggs.
Prior to any cake recipes added to this blog, I’d like to throw in my two cents’ worth on the subject of basic ingredients such as eggs, butter, flour & sugar. The reason being… Before attempts are made at baking, it’s best to have knowledge of the ingredients & know how to handle them to get a good result. There is nothing more irritating than ending up with a bad turn out & not knowing why it happened (or blame me for it!).
So lets start with the subject of ‘eggs’:

  • BUY ‘free range eggs‘. It may command more than double the price of standard eggs, but the hens are bred on better diet & the egg has stronger shell, firmer & strong yellow yolk – much tastier & it is worth the extra cost. It is approx. 17 pence per egg… … … Or better still, buy ‘organic eggs’ approx. 24 pence per egg. (if you’re financially privilaged). Organic eggs are laid by healthy hens who have outdoor access. Their diet is organic – no pesticides, herbicides or fertilizers. Not fed any antibiotics, hormones or meat by-products (= parts of slaughtered animals, not including meat) to fatten them up or make them grow bigger… … … NEVER BUY ‘caged eggs’, ‘regular/ standard eggs’ approx. 7 pence per egg. These are ‘battery farmed’ chickens’, stuck in a small cage all day long, in artificially lit shed. Their diet contains antibiotics, hormones & other chemicals… … … If money is tight, buy ‘barn laid eggs’ approx. 13 pence per egg. Much more humane than ‘caged’, as they are in pens (although the hens are always kept indoors), & can be more ‘chicken-like’, spread their wings & socialize.
  • Use Medium size eggs. Most cake recipes assume that an egg is approx. 50g (yolk 20g, whites 30g). using ‘large’ or ‘extra large’ would give you more whites than what the recipe calls for.
  • Store eggs in a cool, dry place, ideally in the fridge.
  • During baking, one of the basic and common cake procedure is to mix sugar in to the yolk. Here, always whisk in the sugar straight away. Never leave the sugar standing in the yolk. This is because the sugar (just like salt) would soak up the water from the yolk & you’d end up with solidified yellow bits.
  • Some eggs can have salmonella, on the shell as well as inside the egg. Eggs must be handled carefully both when it is still in its shell & once it is cracked open. – Please remember to: Keep eggs away from other foods. Always wash your hands, equipments & work surfaces after handling eggs to avoid cross-contamination. Do not use dirty or damaged eggs. And keep in mind that thoroughly cooking eggs properly kills bacteria.

.

When I was new to all this baking, I had a hard time figuring out how best to beat the egg whites. I was full of questions such as ‘exactly at what timing do you incorporate the sugar?’. It’s plain obvious that correctly whipped egg whites are the core to any successful foam based cake. Getting it right is essential.
.

How to whip or beat egg whites:
1. Put aside the precisely measured sugar ready in another bowl.

2. Get a squeaky clean bowl & whisk. Any traces of grease would prevent the egg whites from foaming well. (Also, don’t use plastic bowls. They can harbour traces of grease. Instead use glass or stainless steel)
3. Crack the egg whites in to the bowl. Make sure there aren’t any trace of egg yolk. Yolk contains fat & it’ll prevent the egg whites from foaming well.

4. Start whisking the egg whites on medium speed.

5. Once the liquid has turned to foam (a cross between bubble-bath & a cappucino froth), pour 1/3 of your sugar from the side of the bowl. Turn the speed to High.
6. When the foam becomes finer, & you see fluffy peaks forming (like Summer clouds), add the second 1/3 of the sugar.

7. The last 1/3 should be incorporated when: the foam is shiny, you start to feel the resistence, & see defining peaks.
8. Just before you finish, rotate the whisk slowly around the bowl – this makes sure that all the foam is of equal size.

9. Fold in the foam to the cake batter straight away. It is deflating as we speak…

« Previous Entries