.
Guess what, guess what, guess what!? Â
Something really exciting happened & I just have to tell you!
This time last week I was in Paris! No, not as a holiday, but was there to… (ahem!) teach about chocolates…! Yes! It was all expenses paid (Eurostar, over-night hotel stay, plus lesson fee) & so much more…! I know, tell me about it, it’s totally amazing what happened, & I’m totally over-the-moon & thank my lucky stars! ^^
.
It was about two months ago I think, I received a message from Mrs C, a long-time blog-reader of mine, that she would like me to do a chocolate workshop for her. It was her 40th birthday this year, & her friends had gotten together to gift her with having a workshop by me! But that she lives in Paris…, so the question arose as to where it’ll be held. Mine? Well…, I have a firm policy not to teach at my family home – which Mrs C totally understood as she herself has a child. In which case, at hers in Paris? Ooooh, Paris? What? Me go to PARIS?! And to top off my already elated ear to ear grin, Mrs C offered to sort out the expenses for the train & the hotel! Oh.My.God!? Seriously!? So at that point I was on the telephone to my Mr D who was at work, asking him for his opinion/ what he thought. Although, to be frank, regardless of Mr D (who did enthusiastically agree also), my mind was already made up on going anyway! I mean, what an opportunity!
.
Planning for the workshop was exciting & actually, pretty easy:
- Â I knew I’d definitely be showing how to temper chocolate on a marble slab, plus another tempering method called ‘seeding’ using the microwave. Although I prefer the marble slab method (as you can control the temperature better ~ which is very important when working with chocolate), the seeding method is rather useful when only a small amount is required, for example for piping a little chocolate decoration.
- And of course the workshop should naturally delve in to how to adapt the tempering technique to actual products. You can use it to enrobe by dipping, & you can use it to mould for hollow & solid shapes.
- Ganache & it’s wonderful variations must also be included in to the workshop too. Ganache, as most of you will know is double cream & chocolate combined. Simple to say, but the science behind it very complex, & the success lies with how well you emulsify the two entities: cream (fat suspended in liquid) & the chocolate (liquid suspended in fat). – -Â There’s various ways of flavouring the ganache too. Like brewing tea like Earl Grey with the double cream first to infuse it! Or what about making caramel with water & sugar, then adding that to the cream? Â – – You can also control how soft you’d want your ganache by changing the ratio of cream to chocolate!
.
So let me tell you about how the first day went.
My day started as I woke up at 5:30am. Outside was pitch black still & I wondered when the last time was that I woke up in the dead of night like this! But the excitement & the anticipation of traveling & giving a lesson blew away any smidgen of sleep in me no problem. Mr D kindly woke up early as well & drove me to a nearby station at 6:40am.
.
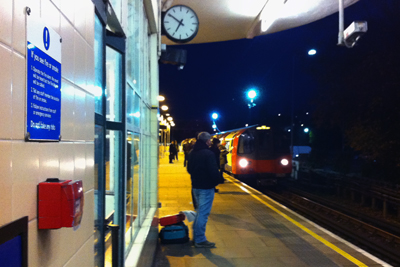
(Here comes the train! And no, that’s not me in the picture. I’m not that stocky…!)
.
Boarding the 8:30am Eurostar for the 2 hour+ journey, I arrive at Gare du Nord to meet Mrs C. We notice each other straight away (she sent me pictures of herself prior)! We both can not conceal our smiles & grins. Oh how happily bizarre this is! And how great that we managed to pull it off! There’s so much to say, so much to talk about!
.
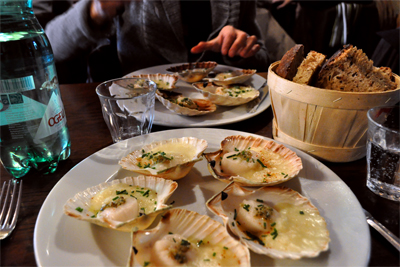
(Coquilles St.-Jacques. Delicious!)
.
We talked & walked to the nearby restaurant called Chez Casimir where Mrs C very kindly bought me lunch. Chez Casimir was a quaint & very French place. When we entered just after 12 noon, it was rather empty except for one couple by the window, but by the time our starters came, the place was heaving with locals. Considering it was only a Monday lunchtime, this place was doing very well indeed! (& that is despite it’s rather worn exterior, I might add! Looks can be deceptive… Surely I should know that lesson by now?? LOL)
.
Now, let’s skip forwards to later that afternoon for the actual 3 hour lesson/ workshop. I explained to Mrs C that we would be working with several recipes in tandem. The reason simply because there is a lot of waiting-time for the ganache to stiffen enough to pipe-able consistency & again more resting time required to then be able to roll them (or cut them) in to shape. - Working with several recipes all at once like this can sound daunting, but I should at this point mention that Mrs C is a very competent baker. And that this workshop is veering toward the advanced level.
.
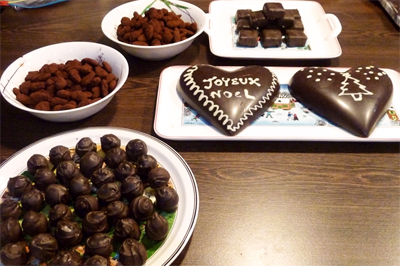
(We made all of this in just 3 hours!!!)
.
I hand over my hand-written recipe for Earl Grey Ganache Truffles. We infused the double cream with Earl Grey. Then re-heat it to pour it over chocolate to make ganache. I explain amongst other things that we exercise creativity & taste preference by deciding how much cream to chocolate ratio you use to determine softness, & how much dark to milk chocolate ratio you use to determine the sweetness.
.
Whilst the Earl Grey ganache is cooling to correct consistency, we move on to make Caramel Ganache Bonbons. For this ganache, we first make caramel with water & sugar. Made with simple ingredients but tricky to successfully stir lump-free if you don’t know how. When medium-light amber in colour, we poured in the double cream that’s been warmed in another pot in tandem. It’s always a bit of a wow moment as the cream ‘fiercely erupts’ to threefold all of a sudden. I hold it as one of the little pleasures in the kitchen. This hot cream then gets sieved over the solid chocolate to form the final ganache.
.
At this point in the lesson, I was hoping for the Earl Grey ganache to be pipe-able, but oh dear, it’s too soft still… Gah… Okay-okay, er… so yes…, let’s pipe design on the chocolate mould!
.
We melted 50 grams of white chocolate by the seeding method, which is the one of the two tempering technique that I wanted to show. We both took turns to pipe a simple design on the heart shaped chocolate mould I brought with me. – At which moment…, I felt a little proud. The very mould was what I purchased in MORA (a professional cookware shop in Paris) over 7 years ago. Who would have thought that I would be bringing it back to Paris, this time to use it to teach with!? :-)
.
Leaving the decorated mould aside to dry, we got back to the Earl Grey, now pipe-able. We practiced piping as systematic as possible, spherical & all of equal size/ weight, because the uniformity of shape effects the final beauty of the product. Where as the caramel ganache, we simply cut in to squares.
.
Time for tempering dark chocolate on the marble slab. Thermometer probe on the ready, we start with melted chocolate in the bowl. Pour two thirds or so on the slab & I showed how to use two metal spatulas to slosh the chocolate on the surface. Spread wide, then bring in from the edges to form a mound, & then repeat the process to keep the temperature of the chocolate uniform. (the edges cool faster than the middle.) When it cools to 29 degrees, we then put this chocolate back in to the original bowl to combine with the hotter non-marbled lot to bring the overall temperature up to 31 to 32 degrees. Et voila.
.
Or so it should have been… My nerves got the better of me it seems, as the chocolate was not tempered perfectly. It wasn’t bad, still had it’s sheen, & it hardened readily, but not super shiny as I’d hoped to show. ~ What a downer. ~ I’m so sorry Mrs C… But being a saintly angel that she is, she told me not to worry, it wouldn’t have happened if I were using my own equipment & was in my own kitchen. Bless her. Really, thank you for being so forgiving…
.
We trudged on regardless, & coated the truffles & the bonbons, which has its plentiful set of techniques to master, & of which I am not going to be writing about here in fear of being long-winded. Oh yeah, before all of that, we poured the tempered chocolate in to the heart shape mould & tipped most of it back in the bowl again to to leave a film of chocolate to form a hollow shape. I explained that if you stick both sides together it becomes a case like an Easter egg.
.
Also, did I mention that along side all of above, we made Caramelized Chocolate Almonds? It’s a rather moreish & beautiful snack made by coating the whole almonds in caramel until it’s all sugared up, then coating it with tempered chocolate by constantly turning it in the bowl like a cement mixer! Another fascinatingly different way of coating with the chocolate other than dipping like truffles!
.
At that…, we finally finished our lesson. And phew, oh boy, on later thought, now that I write about all that we did, I realize it was rather a lot…!
.
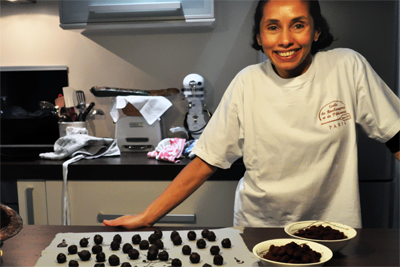
(By the end the work top was a mess! But Mrs C still smiles!)
.
That evening, I was invited back to Mrs C’s & had a lovely supper. Mrs C, her husband E & myself had the most pleasant time, chatting, chatting, chatting! Mostly about food, … of course. Helped by the excellent wine, relaxed & relieved after having had a good workshop, I can tell you that I slept soundly that night in the hotel. And you Mrs C, you must’ve been really knackered too, no?!
.
Mrs C, you have been more than accommodating for me. It felt like it was more than ‘just’ a workshop & I can honestly say that this is definitely the highlight of this year by far for me. THANK YOU VERY MUCH.
.
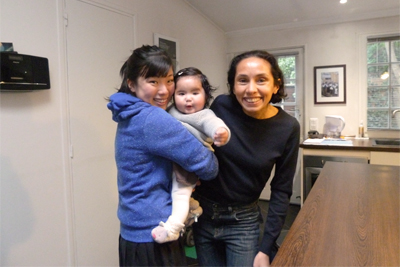
(Me, bebé & mum Mrs C.) Â
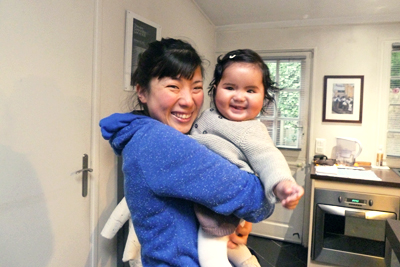
(Ooh, bebé! I Love~!)
.
Ps: In the next post, I’ll write about how the following day went in my Paris trip! ‘Til then! Best, Tamami xoxo


