Ladyfingers & tiramisu
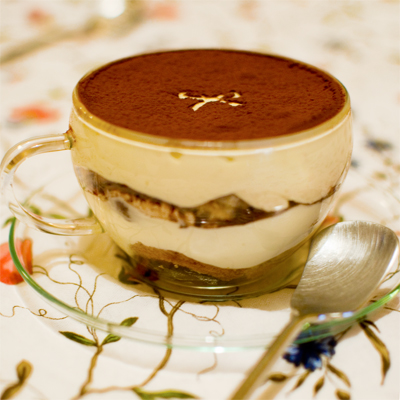
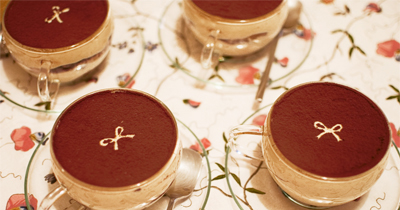
(Tiramisu in individual cup – with ribbon design stenciled.)
.
High time for another recipe! So here goes (…a long one)! ^^
x . . x . . x . . x . . x . . x . . x . . x . . x . . x . . x . . x . . x . . x . . x
.
TIRAMISU
Literally meaning ‘pick me up’, this Italian dessert is made by alternately layering coffee-dipped ladyfingers*, mascarpone mixture, & cocoa powder.
.
Interestingly, the history of tiramisu doesn’t stretch long. You’d think that such a classic Italian dessert would record back from perhaps generations of family tradition or perhaps it might have been conceptualized soon after when zabaglione was invented all the way back in 1570**. But no, although exact origin is not certain, the earliest tiramisu recipe found*** is from only less than 30 years ago.
.
There are many tiramisu recipes out there, but it mainly separates into two camps: raw-egg version or pasteurized egg version. I prefer the pasteurized version – It feels safer that way. I also prefer to use Kahlúa (Mexican coffee flavored rum based liqueur) in the cream mixture as opposed to Marsala wine, as I think it marries the coffee-soaked ladyfingers & the cream better.
.
The following recipe will make 4 & a half tea-cups of tiramisu like the picture above. Obviously, you can make it in one big dish if you prefer. And for the ladyfingers, you can ofcourse use store bought instead, but nothing beats homemade on this one! ^^ So let’s first look in to making the ladyfingers!
.
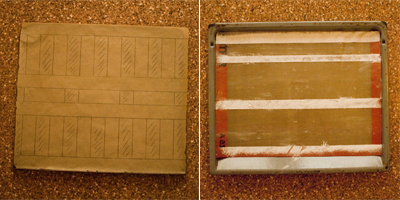
First thing we need to do is to prepare the baking surface with guide lines so that you can pipe the ladyfingers straight with the same length & thickness. – If using baking parchment sheet, use pencil & ruler. Just make sure to reverse the paper so you pipe on the surface without pencil-side. – On a Silpat, you can’t draw, so dust icing sugar instead.
.
BAKING PAPER vs SILPAT
On a Silpat, the back of the ladyfinger will come out smooth & shiny. It comes out rough on baking paper. It is also easier to remove/ lift off the ladyfingers with silpat’s non-sitck surface compared to having to peel it off on baking paper. Silpat also provides even heat transfer to your baked goods. This is because the glass fibres in it increases the heat transfer. I have experimented on both sheets, & I had to add another 4 minutes to the baking time when using baking paper.
.
x . . x . . x . . x . . x . . x . . x . . x . . x . . x . . x . . x . . x . . x . . x
.
LADYFINGERS RECIPE:
Makes about 30 to 35 fingers. (Please note: for the tiramisu recipe below, you will only use half as much)
.
Ingredients:
3 medium eggs
1/8 teaspoon cream of tartar
60g icing sugar
45g cornstarch
30g icing sugar
60g plain flour
.
Method:
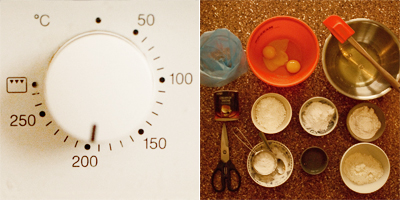
- 1. Start pre-heating the oven to 220°c, as it takes a while to heat up.
- 2.Measure/ prepare all ingredients for smooth operation. (Separate the 3 eggs to two bowls, the egg yolks in to a small bowl & the whites to normal size bowl). Also have the piping bag & scissors ready.
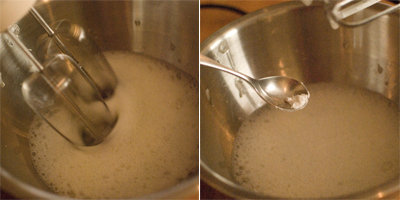
- 3. First, let’s make meringue. In a normal sized bowl, whip the 3 egg whites to foamy stage.
- 4. Add 1/8 teaspoon cream of tartar. Keep whisking.
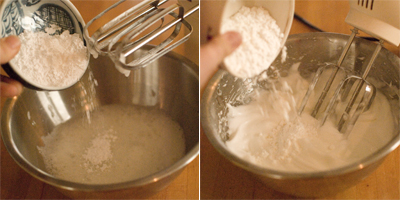
- 5. Next gradually add the 60g icing sugar while whisking. Whisk until soft peak stage.
- 6. Add 45g cornstarch & give it a final whip until hard peaks form. Leave this bowl aside for now.
- 7. Next, quickly go on to the small bowl with the 3 egg yolks. Dump the 30g of icing sugar, then on high speed, whip until it has tripled in volume. It should look paler & fluffier. (To avoid washing-up, just use the same whisk attachment as the one you were using to whip the egg whites!!)
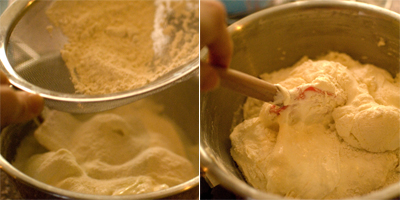
- 7. Spatula in the yolk mixture in to the bowl with the meringue. Fold it in roughly. (Not too much because you will be giving it a proper mix in a moment with the flour anyway!)
- 8. Sieve in the 60g plain flour.
- 9. Gently fold the mixture just until no flour remains to be seen. (Don’t over-mix!!)
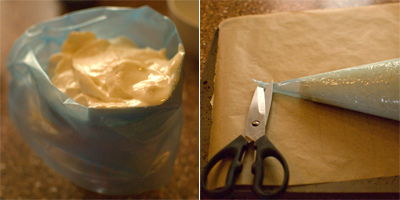
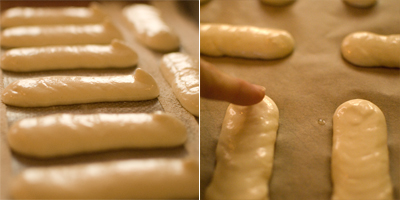
- 10. Place the mixture in to the piping bag & then snip off the tip so that you have a 1cm piping-hole. (Notice in the picture above that the baking sheet is reversed so we’re not piping directly on pencil marks.)
- 10.Slowly & precisely pipe neat lines using the guides on your baking sheet.
(Tip on piping: Start piping about 1cm inside the guide. Squeeze the batter out until it’s a round blob & until it touches the guides. Keeping the pressure flow, gradually & slowly move the piping bag across to make a line.) - 11. Your piped shapes will have a ‘kink’ sticking out where you lifted the piping bag off. So dab minimal amount of water on to your finger & press the pointy bits down very gently & smooth that bit of surface. (If you don’t do this, you will end up with ladyfingers that have burnt pointy bit.)
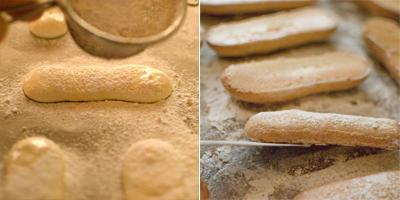
- 12. Sieve plenty of icing sugar on the shapes. Do this twice. (This way, you get the pearlized look, aswell as help it lift the top surface up & give it ‘feet’ around the sides just like a macaron.)
- 13. Bake in the pre-heated oven. Half way through baking, take it out & turn them over so that the underside becomes dry too.
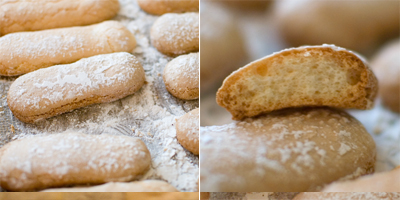
- 14. After about 15 minutes, lift one of the biscuits & tap the back, if it sounds hollow it is done. Take it out & let it cool on the baking tray. You can see from the picture it is baked through & is dry all the way to the middle. It’ll have a nice snap.
.
x . . x . . x . . x . . x . . x . . x . . x . . x . . x . . x . . x . . x . . x . . x
.
TIRAMISU RECIPE
.
Ingredients:
Strong coffee – cold
3g gelatin powder
30g Kahlúa
– – – – – – – – – – – – – – – – – – –
10g Kahlúa
3 egg yolks
80g sugar
250g double cream
250g mascarpone cheese
cocoa powder
.
Method:
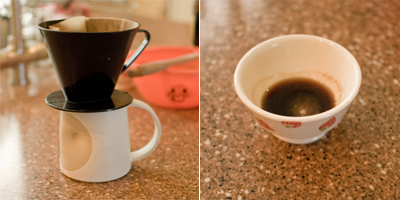
- 1. Make strong coffee & set aside to cool.
- 2. Sprinkle 3g of gelatin powder in to 30g of Kahlúa liqueur. Stir it straight away with a spoon. Set this aside. (Top tip to successfully dissolving gelatin is to add powder to liquid, not visa versa)
- .
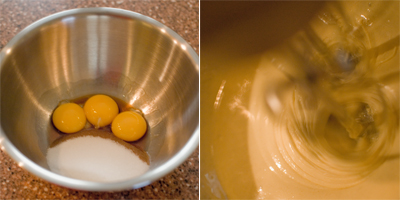
- 3. Next, we pasteurize the eggs: In a small mixing bowl, combine 10g Kahlúa, 3 egg yolks & 80g sugar. Put this bowl over a bain marie & bring the mixture temperature to 60°c, whisking all the time. Beat it for 3 minutes. The mixture will be fluffy & have doubled in quantity. (Note: 60°c temperature for 3 minutes destroys salmonella organisms.)
- 4. Microwave the Kahlúa-gelatin liquid from step 2 for 20 seconds or until the gelatin granules have dissolved. Set this aside to cool.
- .
- 5. In a separate bowl, whip the 250g double cream until it forms stiff peaks. Set aside.
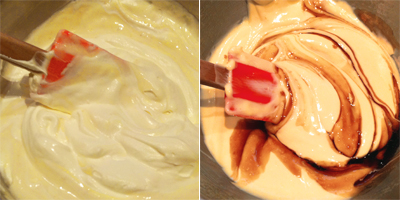
- 6. In another bowl, combine 250g mascapone cheese to the egg-mixture from step 3.
.
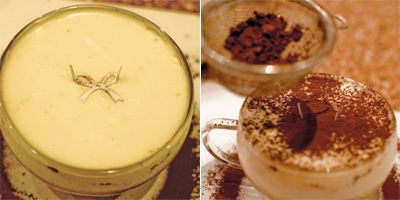
- 7. Then fold in the whipped double cream from step 5 & the cooled gelatin from step 2.
.
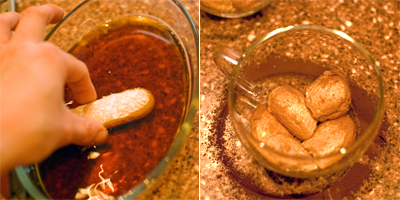
- 8. Have the cold coffee liquid in a shallow bowl, & one by one, soak a ladyfinger in cold coffee on both sides for one second each.
- 9. Align one layer.
.
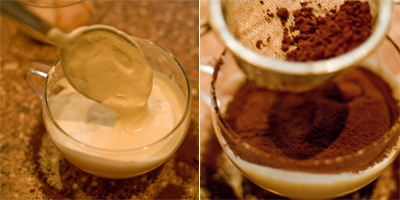
- 10. Layer mascapone mixture to half way.
- 11. Sieve cocoa powder.
.
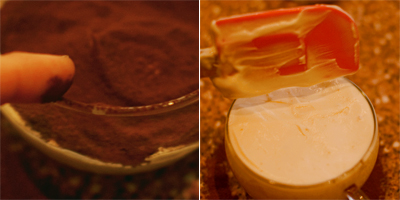
- 12. Run your finger around the cup to remove excess cocoa powder.
- 13. Then repeat by placing another layer of coffee soaked ladyfingers, after that, cream – this time all the way to the top. Finally run your finger around the rim again to tidy up.
- 14. Refrigerate for 4 hours.
.
- 15. Sieve cocoa powder. (use a stencil to customize the top if you like!)
- 17. Finally, use fingertip to go around the glass rim to tidy up the cocoa powder.
- 18. Serve cold. Buon Appetito!!
x . . x . . x . . x . . x . . x . . x . . x . . x . . x . . x . . x . . x . . x . . x
* Ladyfingers are also called ‘savoiardi’ (=from Savoy) in Italian, ‘biscuits à la cuillère’ or ‘boudoirs’ in French, ‘lange vingers’ (=long fingers) in Dutch, ‘Löffelbiskuit’ (=spoon biscuit) in German. ** Detailed instruction of ‘Zambaione’ was mentioned in a cookbook called ‘Opera’ by Bartolomeo Scappi in 1570. *** Book titled I Dolci del Veneto (The Desserts of Veneto) by Giovanni Capnist in 1983. In here, it says “(Tiramisu is) a recent recipe with infinite variations from the town of Treviso†& is a “discovery of restaurants more than family tradition.â€


