(I didn’t have time to buy clotted cream on this occasion… but full-on sloshing of jam will just have to do! ^^ Personally, I like to drink cold milk with my scones rather than tea.)
.
x . . x . . x . . x . . x . . x . . x . . x . . x . . x . . x . . x . . x . . x . . x . . x
.
♡♡♡ It’s recipe time!! ♡♡♡
.
This time, I would like to share with you my take on scones. How I think it should taste & how it should look.
.
Scones are honest, no-frills things aren’t they, there’s no fancy decorations to hide any flaws. And it’s because of that, that it’s all the more important to execute the baking well. When it comes out of the oven, they all ought to look pretty much uniform, & not collapsed lopsided or look like a collection of rocks. There should definitely be a side ways jaggedy break going through the middle, made from when the dough had risen, hinting at how deliciously soft the inside might be like. (Is there a name for this break? The Japanese call it ‘the wolf’s mouth’!)
.
I think it should look unfussy &Â inviting, perhaps even goes as far as being evocative of the laid-back cream teas served by local ladies in pinnies down in the depths of devonshire countryside.
.
Upon creating any of my own recipes, I always set about understanding the ingredients involved & how each plays its part. You know me, I love puzzing up my puzzler when concerned with baking. Afterall “baking is a science” & it’s my firm belief that if you understand the logic, you’re more likely to get a successful result. Not only that, when you vanish the question marks in your head, you would enjoy baking better too! – So here’s what I know about scone science in a Q&A format.
.
x . . x . . x . . x . . x . . x . . x . . x . . x . . x . . x . . x . . x . . x . . x . . x
.
Q: Why do we rub in the butter to the flour?
We rub in the butter to coat the flour so that it doesn’t soak up the wet ingredients as much as if otherwise. The butter fat acts as a barrier around the flour to stop gluten from developing too much. Gluten in cakes, as we know, creates structure which is important, but it also makes the cake firmer.
.
Q:Â Why do we use cold butter?
Now, this is perhaps ‘the’ crucial part of the recipe. Utilize this bit of info & you will undoubtably bake super scones. People who know how puff pastry works will understand this better I think.
.
So you think that it’s the baking powder that is doing all that lifting action right? No siree, there’s a bit more to it. – When the solid bits of butter encased in dough is rapidly heated in the oven, the water contents of the butter evaporates in to air bubbles, & it consequently lifts the gluten structure.
.
For this reason, you know not to handle the dough with warm hands so as not to melt the butter prior to baking. And as cumbersome as it may be, we use the back of the fork (or even better with special pastry blenders) to rub in the butter.
.
This bit of science also answers why the recipe has a high oven temperature setting. We want the butter to powerfully evaporate in the extreme heat, rather than slowly melt & sink in to the flour & wet it, creating excess gluten.
.
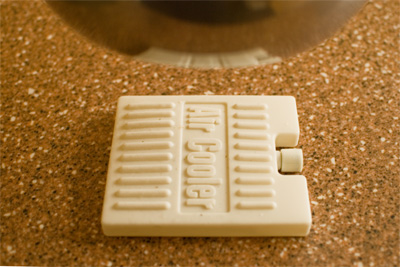
Also, here’s a top tip: if you are baking in the summer, it may be an idea to cool your bowl & utensils in the fridge first! And while you are working, you can put an ice pack under the bowl!
.
Q:Â Why do we rest the dough in the fridge?
Part of the reason lies in the above answer = that the butter within has to be kept cold. Another worthy reason is to relax the gluten strands, one, to produce fluffy texture, & second, to avoid shrinking when it bakes (the rested dough is less elastic).
.
Q:Â What does milk do in baking?
Milk has a a particular & richer mouthfeel, what with its certain subtle sweetness, thickness & slight acidity. Â The liquidity delvelops gluten when mixed with flour & structures the baked goods. And the natural sugar in milk lactose, aswell as the fat, tenderizes the baked goods & makes for moist texture without it being soggy. Milk in baked goods also extends the shelf-life. And the sugar interacting with protein browns the baked goods more readily too.
.
Q:Â Why does your recipe call for the egg wash to be done twice?
Two egg washes with a rest in the fridge in-between to dry the first wash, will darken the top of the scones better & make the scones aesthetically more pleasing. It also gives it a shiny surface & is very smooth to the touch. I personally think that it helps to make the scone look one-rank up & a little more sophisticated.
.
So the key tips to making perfect scones are as follows:
- Use cold butter.
- Don’t dawdle. Work efficiently to avoid butter melting in room temperature.
- Rest the dough in the fridge for more than 30 minutes.
- Bake at high oven temperature.
.
After all the above science-y chalk-talk, I’m probably scaring you away from making these, but please fear not!! Making these scones, you’d never look back to purchase one in the shops! I am so super happy with this recipe! ^^Â It is actually super easy, super amazing, super moreish!
.
x . . x . . x . . x . . x . . x . . x . . x . . x . . x . . x . . x . . x . . x . . x . . x
.
Coco&Me’s super scones recipe
(Yield: It depends on the size of your cutters obviously, but I can make about 7 scones, using my 6.8cm round cutter)
.
Ingredients:
90g salted butter (Â I like using salted butter. If using unsalted, also add a pinch of salt.)
300g plain flour
15g baking powder
45g caster sugar
125ml cold milk
egg yolk for brushing the top surface
.
Method:
- 1. First thing first, cut 90 grams of butter into tiniest cubes possible & place in a large, deep-walled mixing bowl. Refrigerate this bowl with the butter until needed.
- 2. Sieve in 300 grams of flour. (If using unsalted butter, add the pinch of salt in this step.)
- 3. Using the back of the fork (or a special pastry blender if you have one), cut the butter in to the flour. Try to work quickly to avoid the butter from melting. (If you think that the butter is getting soft, place the bowl in the fridge until firm & then work again.Or try my tip & place an ice-pack underneath your bowl.)
- 4. When the butter lumps are as small as a grain of rice, sieve in 15 grams of baking powder.
- 5. Next, toss in the 45 grams of sugar.
- 6. Pour in 125ml of milk & quickly work it in to the flour mixture to form a ball of dough. Here, use a spatula for most of the work, & then your hands at the end only to gather it in to a ball. Next, knead it until it is less bumpy. But also keep in mind to never over-work the dough so as not to produce gluten.
- 7. Cling film it tightly & refrigerate for more than 30 minutes.
- 8. After the 30 minutes rest, flour the work surface. Using the rolling pin, roll the dough flat to 2.5 to 3cm height.
- 9. Then proceed to cut discs out. Very lightly flour the insides of the round cutter, & with equal force from straight above, cut in to the dough. Never twist the cutter or else you will get a lopsided scone.
- 10. Place the discs on to the baking tray lined with baking sheet. Here, when moving the discs, never ever touch the cut sides.
- 11. Brush the top surface with loosened egg yolk. Brush to the edges, but be careful not to let the egg wash drool down the sides.
- 12. Rest it in the fridge again until the egg wash is dry to the touch (approximately 10 minutes).
- 13. In the meantime, proceed to pre-heat the oven to 210 degrees centigrade.
- 14. Brush on the egg wash for the second time.
- 15. Place tray in the oven for about 10 to 12 minutes (dependent of size of your scones). Turn the oven sheet half way baking to ensure even heat/ even rise.
- 16. Best served warm!! xx
.

(By the way, it’s best to align the scone discs diagonally on the baking tray. The hot oven air flows better to each & individual discs better than if the discs were horizontally aligned.)
.

(Did you know, the proper way to split open the baked scone is not with a knife but by fingers, right where the crack is!) Â
.
Lastly, scone trivia!
Do you spread the jam above or under the clotted cream? Cornwall has the jam underneath & Devon has theirs above (I’m a jam on top girl by the way).


