First ever Coco&Me baking lesson!
.
Hello~hello~hello~ dearest readers!!!!! So sorry for not writing often on this blog…! Hope you’ve all been well. Is life treating you sweetly? And I wonder, are you looking after yourself well?
.
I’ve been ultra busy with God-knows-what, just a bit of everything mounting to one big busy-ness I guess, I feel my mind’s cluttered up that, if I was to compare this situation to a computer, it’s overloaded & hence the system is running slowly. Basically not achieving as much output as I ought to. Does this make sense??? Lol. Sometimes I don’t know anymore.
.
Anyway, the idea is to do ‘one-thing-at-a-time’ isn’t it? So here’s a write up about what happened (ahem,) all the way back in December 2011.
.
x . . x . . x . . x . . x . . x . . x . . x . . x . . x . . x . . x . . x . . x . . x
.
Actually, no, it was October 2011, I received a special message through this blog by F, a guy wanting to organize a one-off baking lesson as a Christmas gift for his girlfriend Z. And that he wants it to be a surprise for her. (Ladies, one-two-three! “Ahhhhhh…!” How sweet!)
.
On first reaction, Hm, I thought. Not sure.
I mean, I can’t even strike up a courage to go to cinemas alone, so how would I feel going to a strangers’ house? But the message read that they are regular customers of mine at the market. I thought back to all the customers that I can remember & I couldn’t think of any weirdos…
.
I emailed back hinting that it would be best if he could come to the stall so that we could discuss it further. (Although the actual secret intention was to see who this F was!)
.
It turned out he can’t until November as he has to be out of town. – Hm… decisions… Oh, go-on, let’s do it then. Perhaps there must’ve been something in the waters that day, (or maybe I glimpsed a Nike ‘Just do it’ logo!?) but I thought yeah, new experience, new opportunity & all that. Just do it? Yes, I’ll do it! My heart was pounding as I wrote back to confirm, because I was still totally not sure, but I thought (sorry F) I could always call it off if I didn’t like the look of F when he comes to the stall in November.
.
Come November, F dropped by my stall. Turns out he is a charming, likable bloke. With great relief, I chatted with him about our surprise plan. He then came back to my stall with the unknowing girlfriend Z to pretend to browse the cakes. The real intention to secretly introduce her to me. Did I do well with my poker face F?? Lol! :)
.
December. Knowing who they were was a huge plus. On the baking day itself, I was not as nervous as I’d thought I’d be. Giddy, oh yes, but in an excited way. With a small suitcase full of ingredients, pots n’ pans, & with a heart pounding fast like a small animal, I rang their door bell. F opens & signals me to quietly go to the living room. I hear Z in the other room asking who’d come. She definitely senses something is up. Aw, I hope she likes this surprise… What if she hates this or hates me? Even worse not recognize me!?
.
Very pretty girl Z peers in to the living room. One look at me &… big big smiles & little shrieks. So natural, so sweet. I instantly knew that we’d get on absolutely finely.
.
F & I spilled the beans of our secret. How F had been planning months ahead, how F took Z to my stall… The surprised look on Z…, & her smiles & laughter as she listened, so adorable.
.
So! It’s a 3 hour baking course, I explain. We’ll be making tarte tatin, chocolate truffles, creme caramel & homemade vanilla extract!
.
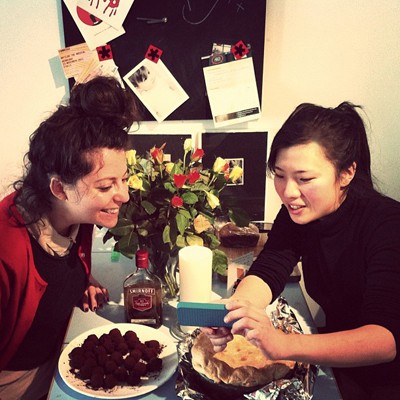
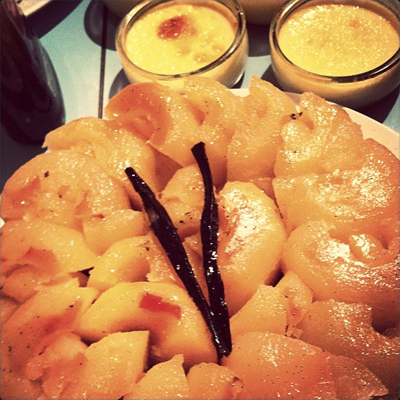
Like a team-work, we peeled braeburn apples, cored them, arranged them in the caramel/vanilla pan… On went the sheet of puff pastry, not forgetting to tuck in the edges… 40 minutes in the oven. Hey presto, tarte tatin.
.
.
Following that, we made ganache for the truffles. This was in tandem with making vanilla extract as the ganache needs to cool before piping, then more cooling after that so that it is firm enough to roll, coat in melted chocolate & finally rolled in cocoa powder. – Finally it was on to making the Creme caramel which was a doddle, & we finished almost exactly 3 hours of lesson time.
.
Like I said, we had this amazing team-work thing going on, & I felt that it was rather more like two girl friends having fun baking & chatting. Sure, I’d be peppering in baking tricks & know-hows, & answering baking questions, but it certainly didn’t feel like a strict teaching setup. And I much prefer it that way.
.
Thank you F for setting up this most amazing, valuable experience. I’m really glad I said yes. And thank you Z, I’m so happy that my first ever baking student was you! ♥
.
♥♥
One year on
.
Yesterday was exactly one year on from the big earthquake & the subsequent tsunami that struck North East of Japan.
.
I pray for the 15,854 people that didn’t make it that day, the 3,155 people that are still missing, & offer my heart to their families & friends who are still coming to terms with their grief. Not only that, my heart cry for the poor residents of the affected areas going through such a tough, tough time. There are more than 330,000 people living in temporary accommodation (including those staying with family & friends or in hotels), many of them unsure of what the future will be like.
.
Living is extra difficult after the triple meltdown at Fukushima plant. As well as the debris, the soil within large vicinity has been polluted & the current news/ debate in Japan is where to dispose the millions of tonnes of polluted soil that’s been scraped up. Understandably no town wants to agree to placing the temporary storage facility the government is proposing.
.
The discharged nuclear pollutants has also plagued the residents with health fears. And worries are abound, especially for the children, as to how this would affect them if atall eventually.
.
Ever since when the disaster struck last year, I have a small donation box on my stall table at the market. I would like to take this opportunity to report to you that this little box has so far raised £365.53. Isn’t it amazing!? Thank you Broadway Market goers!!! The generosity you have shown is truly touching… I have been donating this money in batches to Red Cross Japan. - Yes, in recent days the donation amount has been really low (2 weeks ago, it only collected 50p…!) but every little counts as they say! ^^ ArigatÅ.
.
Ps: The Japanese government has designed a campaign to express gratitude for its support for the Japan Earthquake. As part of the St Patrick’s Day Festival on Sunday March 18th in London, Japanese performers including maiko, geisha & traditional instrument performers will take part in the ARIGATO parade. – There is also “Tasting Japan” experience at Westfield Stratford with Japanese food & alcohol!
Ladyfingers & tiramisu
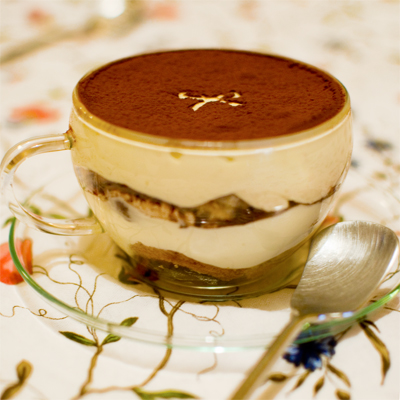
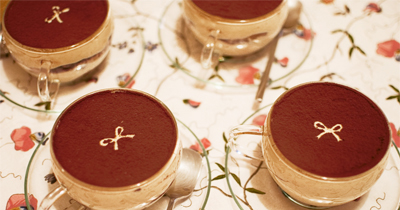
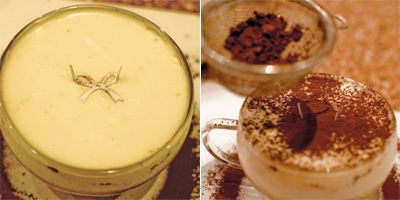
(Tiramisu in individual cup – with ribbon design stenciled.)
.
High time for another recipe! So here goes (…a long one)! ^^
x . . x . . x . . x . . x . . x . . x . . x . . x . . x . . x . . x . . x . . x . . x
.
TIRAMISU
Literally meaning ‘pick me up’, this Italian dessert is made by alternately layering coffee-dipped ladyfingers*, mascarpone mixture, & cocoa powder.
.
Interestingly, the history of tiramisu doesn’t stretch long. You’d think that such a classic Italian dessert would record back from perhaps generations of family tradition or perhaps it might have been conceptualized soon after when zabaglione was invented all the way back in 1570**. But no, although exact origin is not certain, the earliest tiramisu recipe found*** is from only less than 30 years ago.
.
There are many tiramisu recipes out there, but it mainly separates into two camps: raw-egg version or pasteurized egg version. I prefer the pasteurized version – It feels safer that way. I also prefer to use Kahlúa (Mexican coffee flavored rum based liqueur) in the cream mixture as opposed to Marsala wine, as I think it marries the coffee-soaked ladyfingers & the cream better.
.
The following recipe will make 4 & a half tea-cups of tiramisu like the picture above. Obviously, you can make it in one big dish if you prefer. And for the ladyfingers, you can ofcourse use store bought instead, but nothing beats homemade on this one! ^^ So let’s first look in to making the ladyfingers!
.
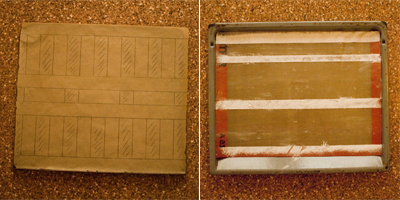
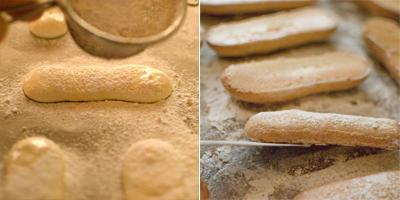
First thing we need to do is to prepare the baking surface with guide lines so that you can pipe the ladyfingers straight with the same length & thickness. – If using baking parchment sheet, use pencil & ruler. Just make sure to reverse the paper so you pipe on the surface without pencil-side. – On a Silpat, you can’t draw, so dust icing sugar instead.
.
BAKING PAPER vs SILPAT
On a Silpat, the back of the ladyfinger will come out smooth & shiny. It comes out rough on baking paper. It is also easier to remove/ lift off the ladyfingers with silpat’s non-sitck surface compared to having to peel it off on baking paper. Silpat also provides even heat transfer to your baked goods. This is because the glass fibres in it increases the heat transfer. I have experimented on both sheets, & I had to add another 4 minutes to the baking time when using baking paper.
.
x . . x . . x . . x . . x . . x . . x . . x . . x . . x . . x . . x . . x . . x . . x
.
LADYFINGERS RECIPE:
Makes about 30 to 35 fingers. (Please note: for the tiramisu recipe below, you will only use half as much)
.
Ingredients:
3 medium eggs
1/8 teaspoon cream of tartar
60g icing sugar
45g cornstarch
30g icing sugar
60g plain flour
.
Method:
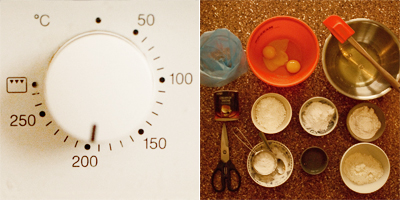
- 1. Start pre-heating the oven to 220°c, as it takes a while to heat up.
- 2.Measure/ prepare all ingredients for smooth operation. (Separate the 3 eggs to two bowls, the egg yolks in to a small bowl & the whites to normal size bowl). Also have the piping bag & scissors ready.
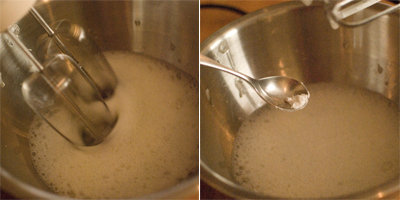
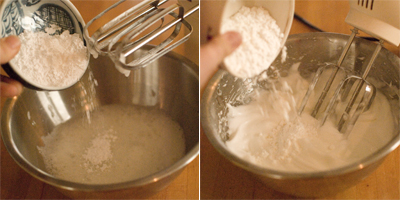
- 3. First, let’s make meringue. In a normal sized bowl, whip the 3 egg whites to foamy stage.
- 4. Add 1/8 teaspoon cream of tartar. Keep whisking.
- 5. Next gradually add the 60g icing sugar while whisking. Whisk until soft peak stage.
- 6. Add 45g cornstarch & give it a final whip until hard peaks form. Leave this bowl aside for now.
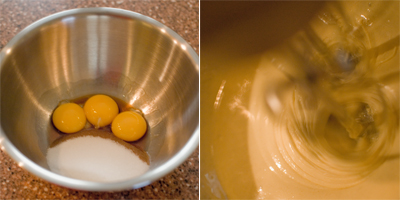
- 7. Next, quickly go on to the small bowl with the 3 egg yolks. Dump the 30g of icing sugar, then on high speed, whip until it has tripled in volume. It should look paler & fluffier. (To avoid washing-up, just use the same whisk attachment as the one you were using to whip the egg whites!!)
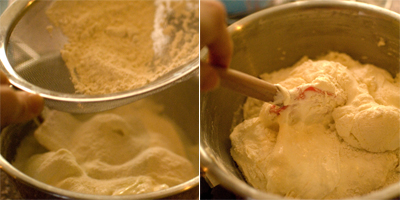
- 7. Spatula in the yolk mixture in to the bowl with the meringue. Fold it in roughly. (Not too much because you will be giving it a proper mix in a moment with the flour anyway!)
- 8. Sieve in the 60g plain flour.
- 9. Gently fold the mixture just until no flour remains to be seen. (Don’t over-mix!!)
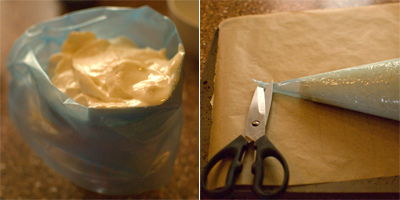
- 10. Place the mixture in to the piping bag & then snip off the tip so that you have a 1cm piping-hole. (Notice in the picture above that the baking sheet is reversed so we’re not piping directly on pencil marks.)
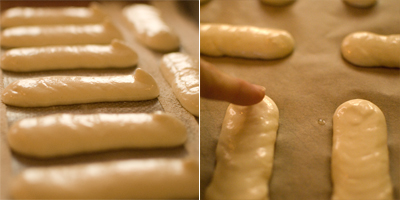
- 10.Slowly & precisely pipe neat lines using the guides on your baking sheet.
(Tip on piping: Start piping about 1cm inside the guide. Squeeze the batter out until it’s a round blob & until it touches the guides. Keeping the pressure flow, gradually & slowly move the piping bag across to make a line.) - 11. Your piped shapes will have a ‘kink’ sticking out where you lifted the piping bag off. So dab minimal amount of water on to your finger & press the pointy bits down very gently & smooth that bit of surface. (If you don’t do this, you will end up with ladyfingers that have burnt pointy bit.)
- 12. Sieve plenty of icing sugar on the shapes. Do this twice. (This way, you get the pearlized look, aswell as help it lift the top surface up & give it ‘feet’ around the sides just like a macaron.)
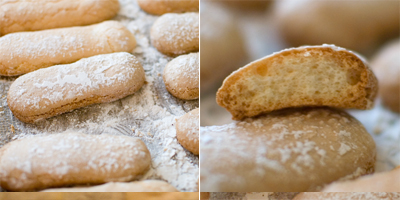
- 13. Bake in the pre-heated oven. Half way through baking, take it out & turn them over so that the underside becomes dry too.
- 14. After about 15 minutes, lift one of the biscuits & tap the back, if it sounds hollow it is done. Take it out & let it cool on the baking tray. You can see from the picture it is baked through & is dry all the way to the middle. It’ll have a nice snap.
.
x . . x . . x . . x . . x . . x . . x . . x . . x . . x . . x . . x . . x . . x . . x
.
TIRAMISU RECIPE
.
Ingredients:
Strong coffee – cold
3g gelatin powder
30g Kahlúa
– – – – – – – – – – – – – – – – – – –
10g Kahlúa
3 egg yolks
80g sugar
250g double cream
250g mascarpone cheese
cocoa powder
.
Method:
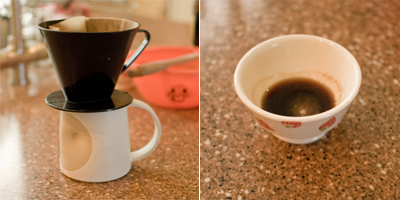
- 1. Make strong coffee & set aside to cool.
- 2. Sprinkle 3g of gelatin powder in to 30g of Kahlúa liqueur. Stir it straight away with a spoon. Set this aside. (Top tip to successfully dissolving gelatin is to add powder to liquid, not visa versa)
- .
- 3. Next, we pasteurize the eggs: In a small mixing bowl, combine 10g Kahlúa, 3 egg yolks & 80g sugar. Put this bowl over a bain marie & bring the mixture temperature to 60°c, whisking all the time. Beat it for 3 minutes. The mixture will be fluffy & have doubled in quantity. (Note: 60°c temperature for 3 minutes destroys salmonella organisms.)
- 4. Microwave the Kahlúa-gelatin liquid from step 2 for 20 seconds or until the gelatin granules have dissolved. Set this aside to cool.
- .
- 5. In a separate bowl, whip the 250g double cream until it forms stiff peaks. Set aside.
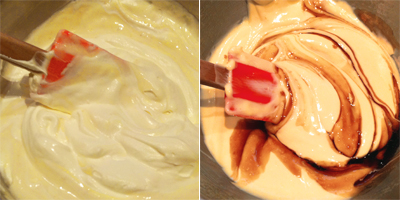
- 6. In another bowl, combine 250g mascapone cheese to the egg-mixture from step 3.
.
- 7. Then fold in the whipped double cream from step 5 & the cooled gelatin from step 2.
.
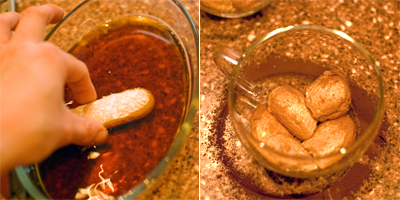
- 8. Have the cold coffee liquid in a shallow bowl, & one by one, soak a ladyfinger in cold coffee on both sides for one second each.
- 9. Align one layer.
.
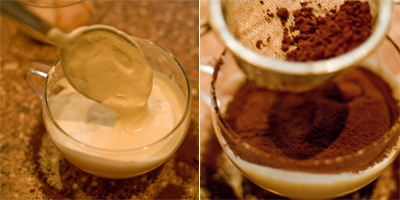
- 10. Layer mascapone mixture to half way.
- 11. Sieve cocoa powder.
.
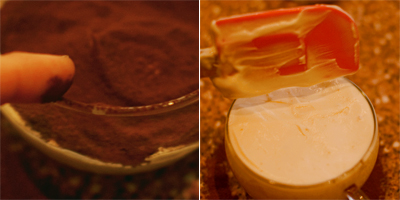
- 12. Run your finger around the cup to remove excess cocoa powder.
- 13. Then repeat by placing another layer of coffee soaked ladyfingers, after that, cream – this time all the way to the top. Finally run your finger around the rim again to tidy up.
- 14. Refrigerate for 4 hours.
.
- 15. Sieve cocoa powder. (use a stencil to customize the top if you like!)
- 17. Finally, use fingertip to go around the glass rim to tidy up the cocoa powder.
- 18. Serve cold. Buon Appetito!!
x . . x . . x . . x . . x . . x . . x . . x . . x . . x . . x . . x . . x . . x . . x
* Ladyfingers are also called ‘savoiardi’ (=from Savoy) in Italian, ‘biscuits à la cuillère’ or ‘boudoirs’ in French, ‘lange vingers’ (=long fingers) in Dutch, ‘Löffelbiskuit’ (=spoon biscuit) in German. ** Detailed instruction of ‘Zambaione’ was mentioned in a cookbook called ‘Opera’ by Bartolomeo Scappi in 1570. *** Book titled I Dolci del Veneto (The Desserts of Veneto) by Giovanni Capnist in 1983. In here, it says “(Tiramisu is) a recent recipe with infinite variations from the town of Treviso†& is a “discovery of restaurants more than family tradition.â€
Galette des Rois 2012
.
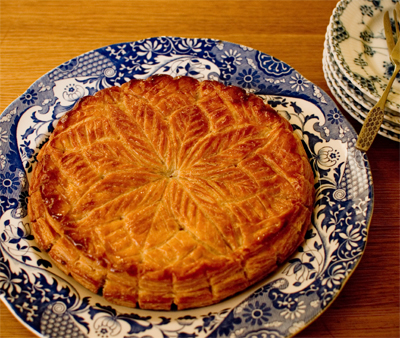
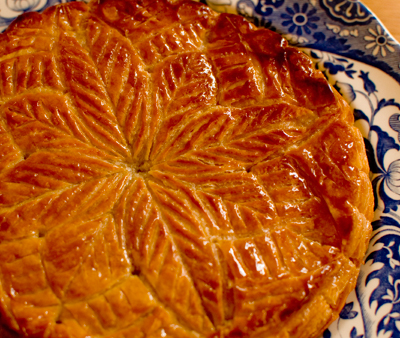
This year for Epithany, I made Galette des Rois from scratch again. Puff pastry & all. This time, leaf pattern. I think it looks country-esque & more like a pie compared to the swirly patterns on Parisian ones but I was wary of scoring those swirls as it needs to be so precise.
.
Anyway, I’m quite pleased with the result, the puff pastry didn’t pull in strange angles & the galette came out almost perfectly circle! Phew!
.
The ultimate tip when working with puff is PATIENCE.
Firstly, I know it takes a looong time to make, but the waiting time in the fridge mustn’t be shortened by haste. And after you made it, it also needs a 12 hour rest in the fridge before using it/ rolling it out. It’s all about resting the gluten in the flour, otherwise the pastry will shrink upon baking.
.
Then when rolling, if you think that the pastry is getting too soft, you have to put it back in the fridge to cool before approaching it again. – Never let that multitude layers of butter melt, because it’s the butter (actually, it’s the water content in the butter) who does the all-important puffing/ lifting, when it evaporates under the extreme oven heat. This ‘extreme oven heat’ is key too. It needs to be atleast 200 degrees centigrade. Anything less than that, the layers of flour will stick together because of poor evaporation & the whole thing won’t rise like the way you want it to.
.
So yes, resting it in fridge & keeping it cool while working. And oh, when rolling out, roll to all directions from the middle outwards (never back & forth), & also turn it over & do a bit of rolling on that side too. Yes, phew!
.
(Cooled down sugar syrup (water & sugar 5:5) brushed on surface of just-baked galette for the shiny look! )
.
No picture of it cut in to a slice, I’m afraid! We’re gonna eat it later with everyone & try find my fève charms, Lyla & Roger, doing their once-a-year duty of hide & seek!
.

